Cabrini Redux
Designer: Johnny Richards
Project Time: 2 hours
Project Complexity: Beginner
Project Cost: <$100
Design Goals:
In the summer of 2011, I designed an ultra affordable 2-way around the GRS 6.5″ poly cone midwoofer and the 3″x7″ Goldwood piezo tweeter. It proved to be a popular recommendation for those looking for a quick, affordable build for a variety of purposes. When Parts Express expanded their GRS product line to include several new tweeters, I decided to look into another project utilizing these drivers and settled on an iteration of the original Cabrini.
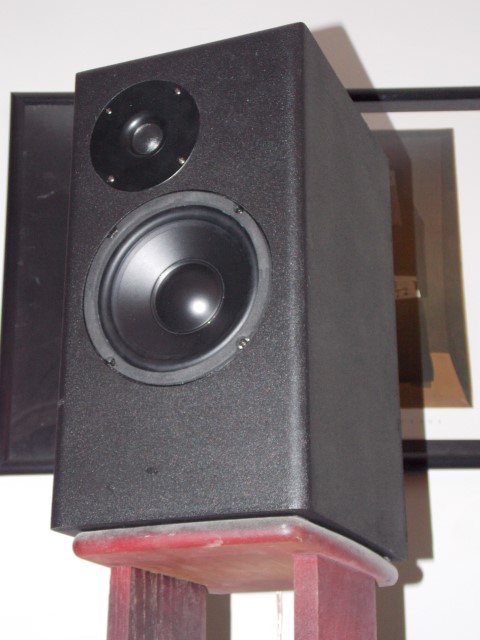
Cabrini Redux is intended to symbolize the “next step” in the evolution of a builders progress. It differs from the original Cabrini in that this design specifies flush mounted drivers, uses a dome tweeter, and the cabinet construction is slightly more advanced with the use of an internal brace and round-overs on the edges.
Driver Selection:
The GRS line had recently been expanded to include two dome tweeters. In addition to the 6.5″ poly cone mid-woofer I had already decided to use, I wanted to use one of the new dome tweeters available. Based on aesthetics and price, I elected to use the 1TD1-8 1″ dome tweeter. It offers a classic, almost elegant appearance while at the same time maintaining the overall unassuming, yet comfortable visual effect of the entire GRS lineup.
Enclosure Design:
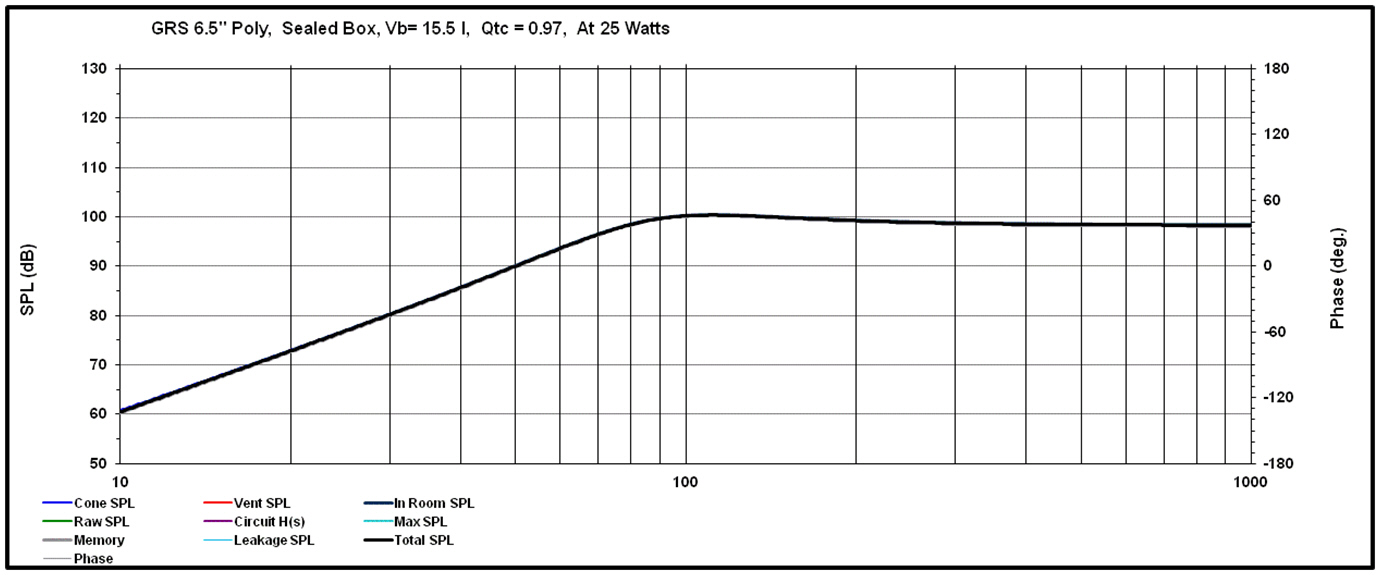
As the GRS woofer is a high “Q” model, it operates best in a sealed bass alignment. My measurements of the woofer were nearly identical to those supplied by Parts Express, in fact they were within 5% in all directions. This is close enough to attribute to the differences in measurement methodology and pure simulations can be undertaken safely.
For maximum efficiency in the build process, I duplicated the Parts Express flat pack (p/n 300-7064). This cabinet has a net internal volume of 0.56 ft3, which, when stuffed with 1/2lb of premium type poly-fil or Acousta-stuff material results in a system “Q” of 0.97. This was arrived at by including the effect of the series resistance of the crossover on overall system response. Modeled F3 is 73Hz.
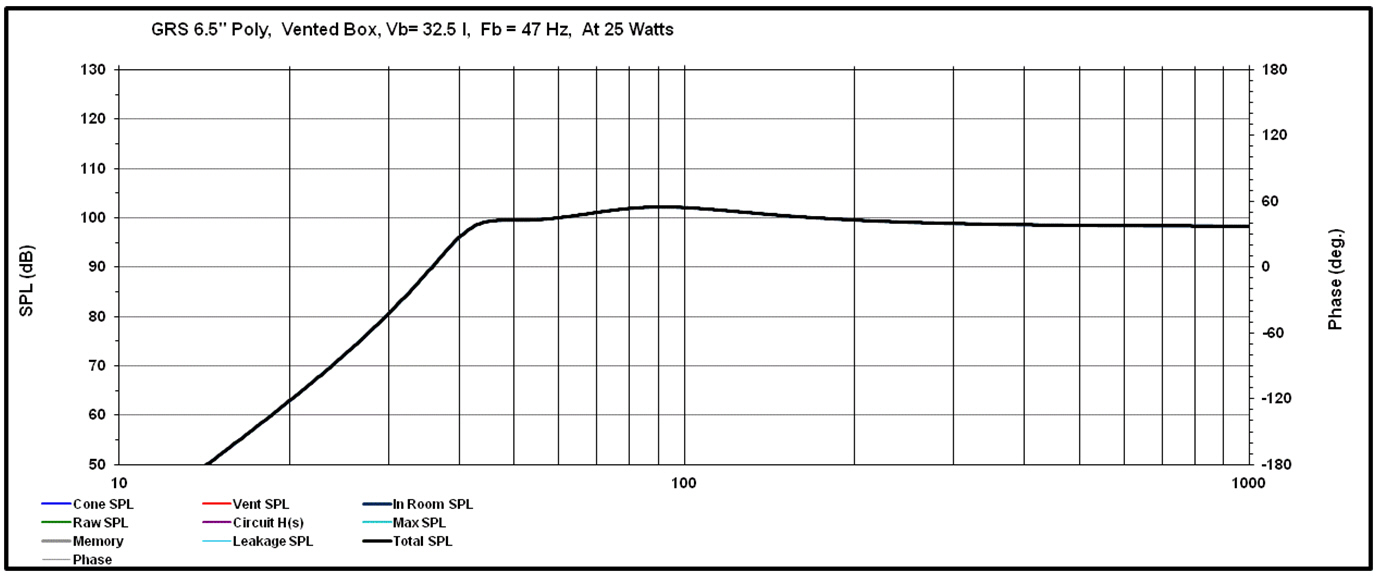
On request, I also modeled a vented floor stander (using the Parts Express 1.16 ft3 as my guide), and to my surprise it actually turned out to be what I would consider a very viable alternative. This was also modeled with the series resistance of the woofer crossover, and results in a system F3 of 45Hz which turns this into a nearly full range music system.
Crossover:
One aspect of a design using entry level drivers that can quickly escalate a design out of true “budget” territory is the possibility of a complicated crossover resulting from poorly behaved drivers. In keeping with the original spirit of the Cabrini, I wanted to keep the crossover as simple as possible while maintaining cost and performance goals. The in-box measurements showed both drivers exhibit fairly well controlled behavior, which simplifies crossover design significantly.
With a simple 4-element crossover, it yielded a response that maintains +/- 3db across the entire range, with both channels matching within 1db of each other.
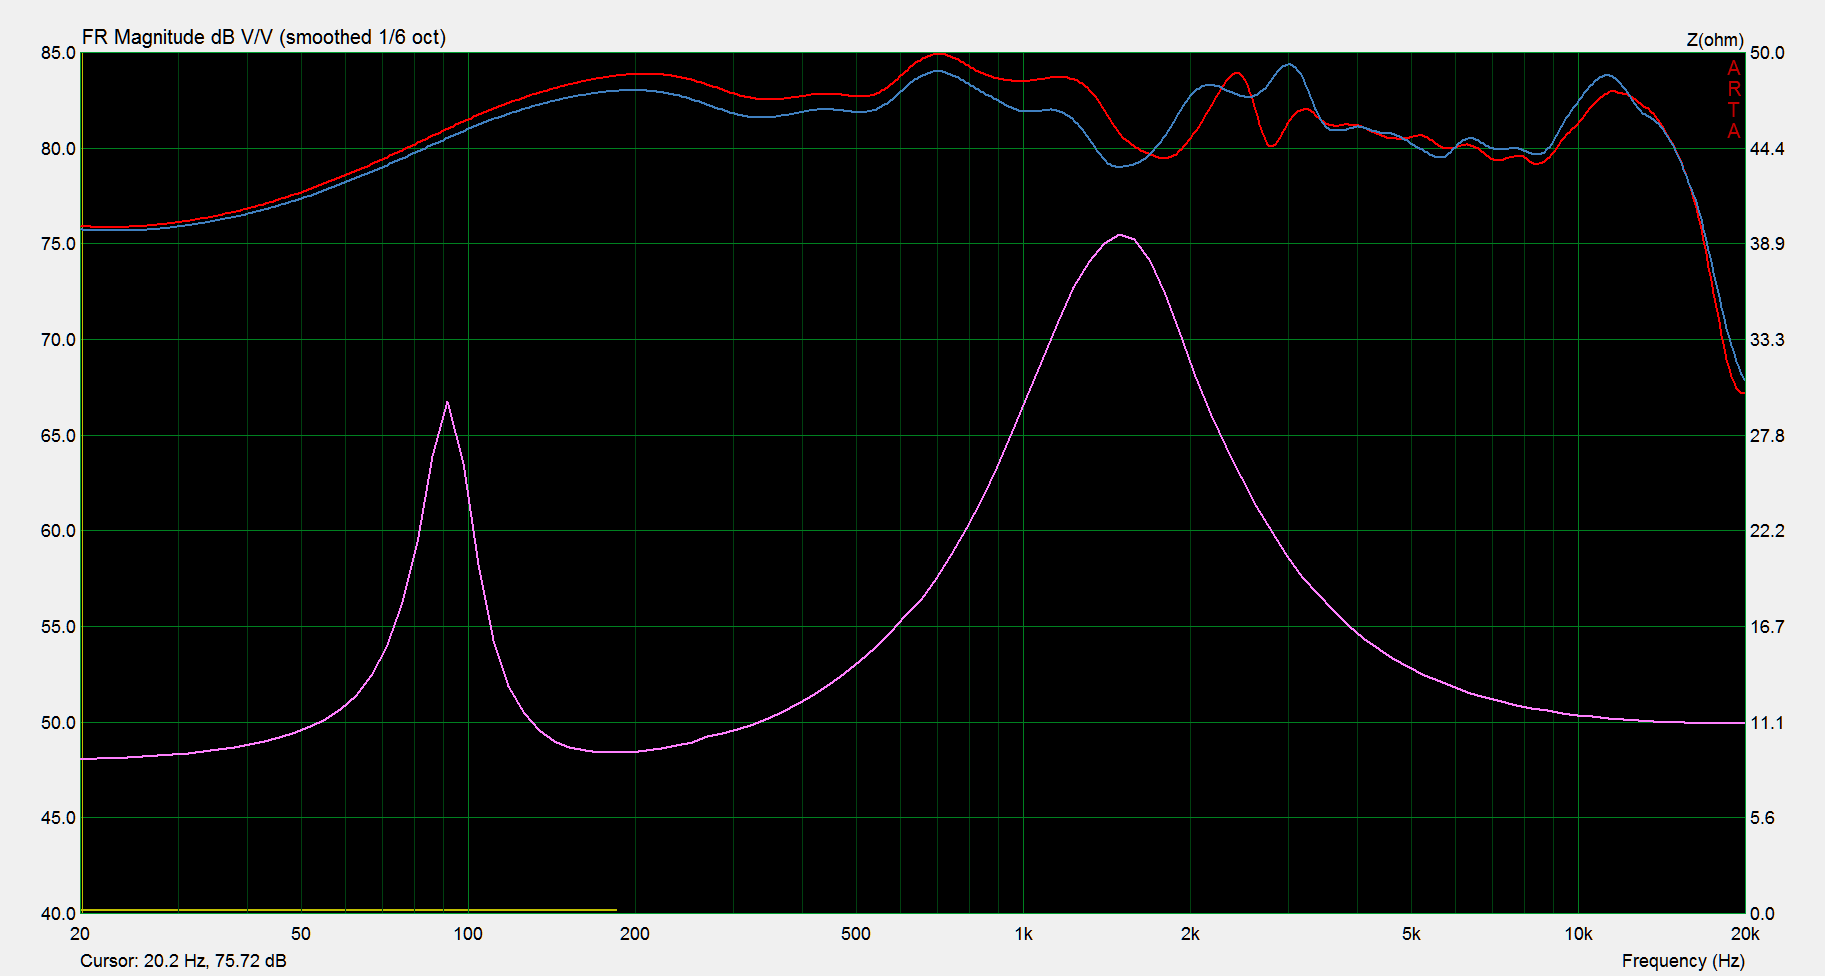
It yields a benign impedance that never dips below 8 ohms, and stays within +/-45 degrees of phase angle. This speaker can safely be driven by any amplifier on the market.

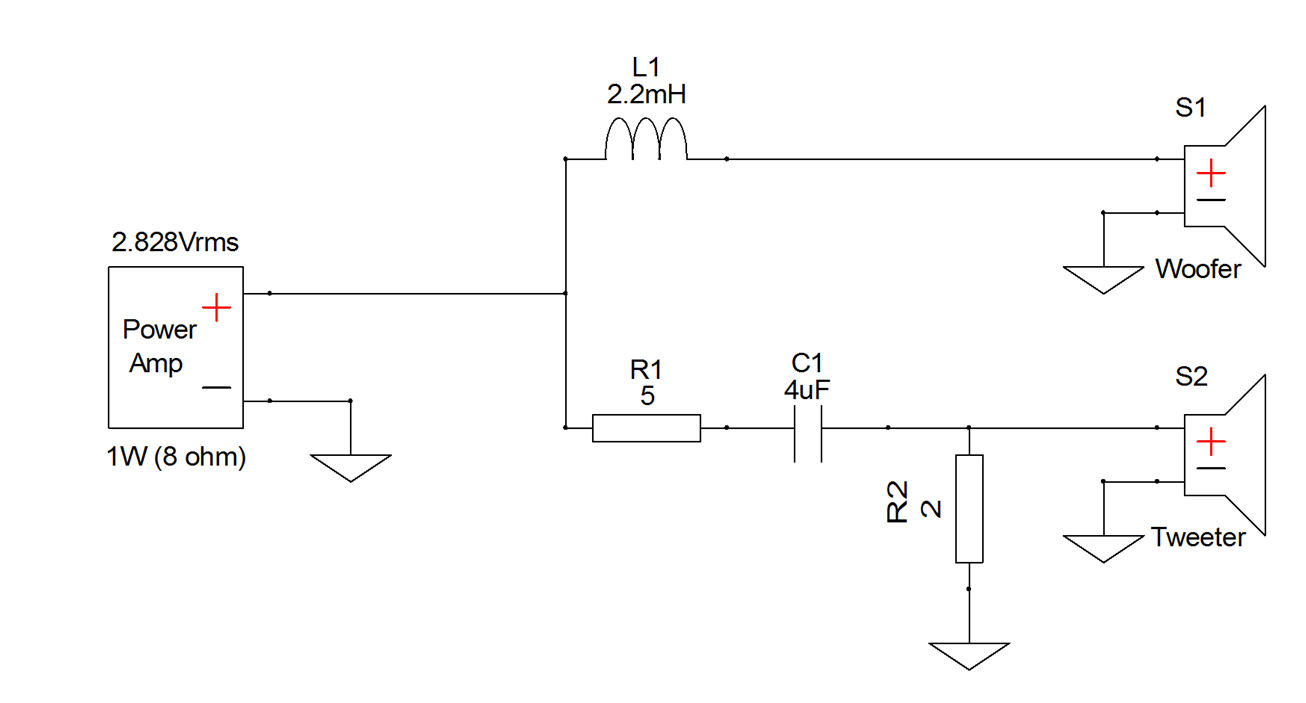
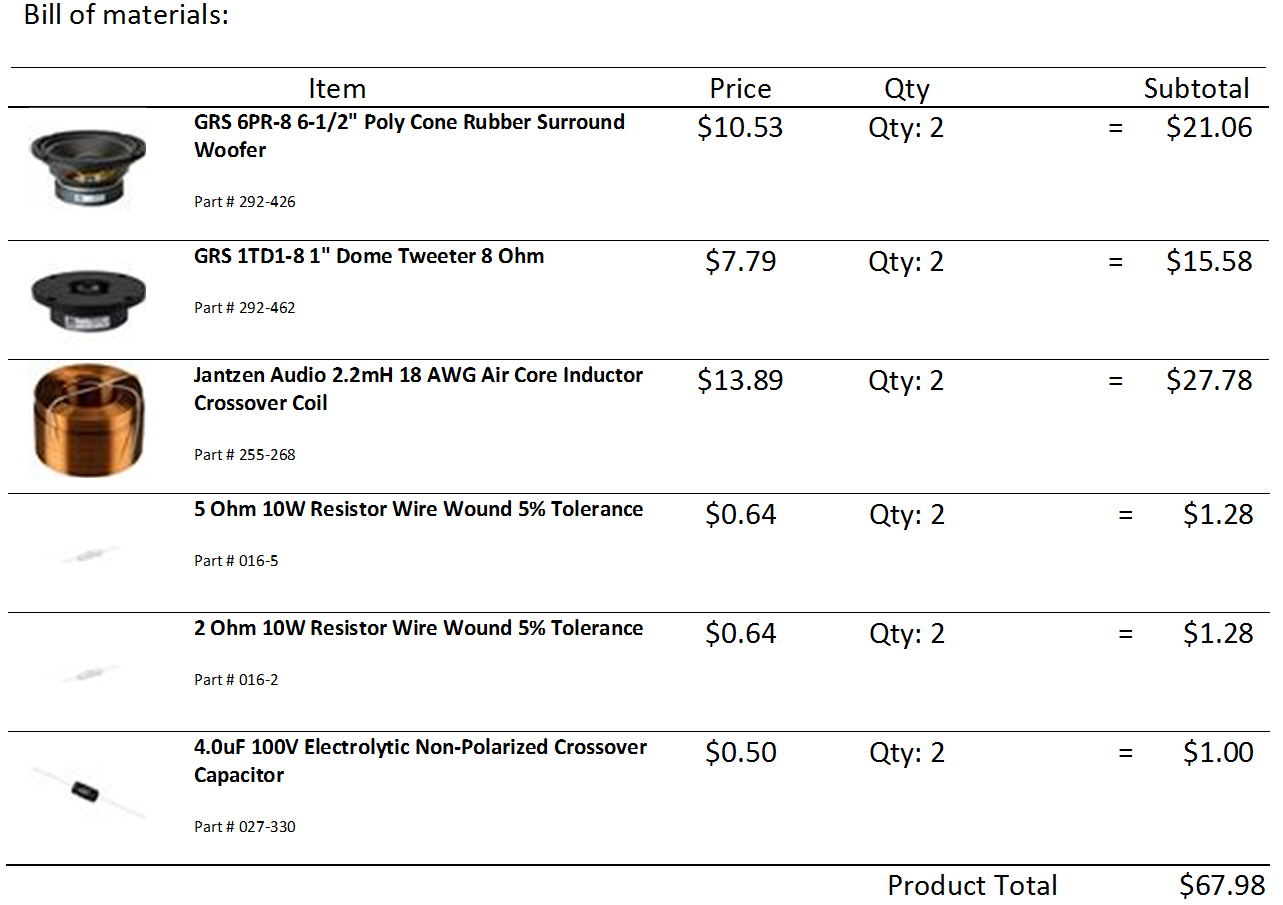
The crossover uses a series coil on the woofer, and a series resistor, capacitor, and parallel resistor on the tweeter. This makes it very easy to assemble, as well as being very cost and performance effective.
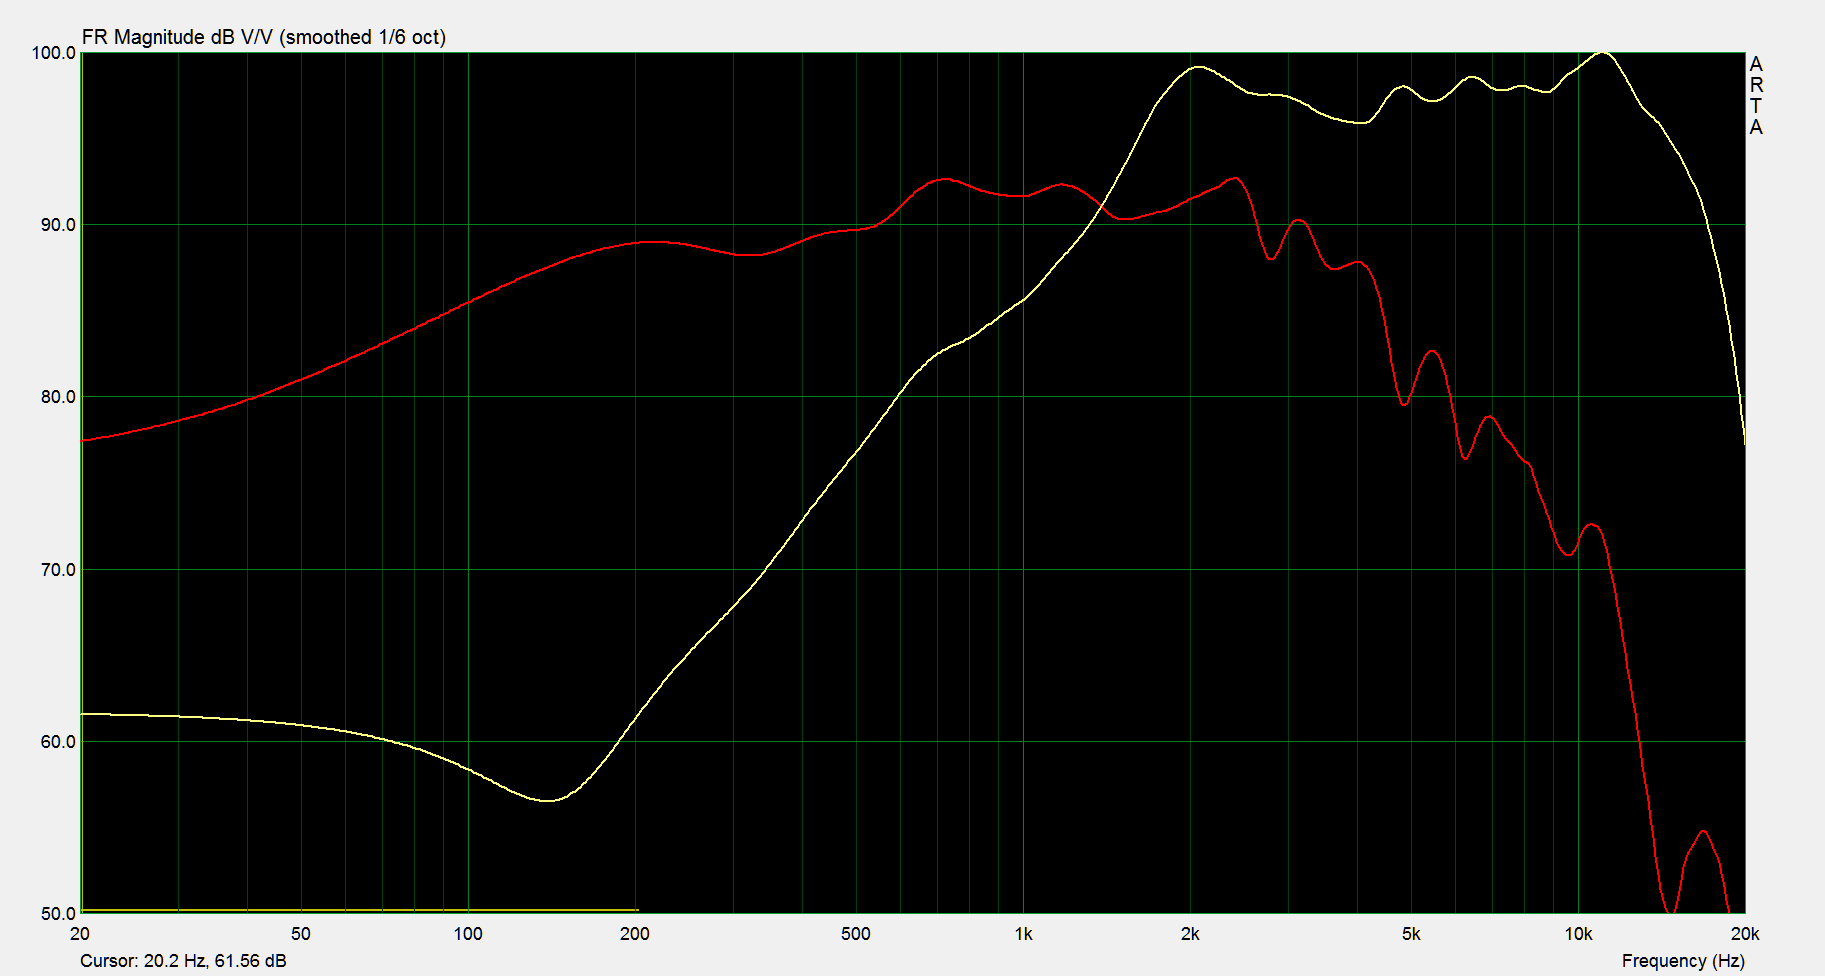
In addition to respectable linear response, this system shows surprisingly low distortion. The following measurement is SPL accurate at 1M:
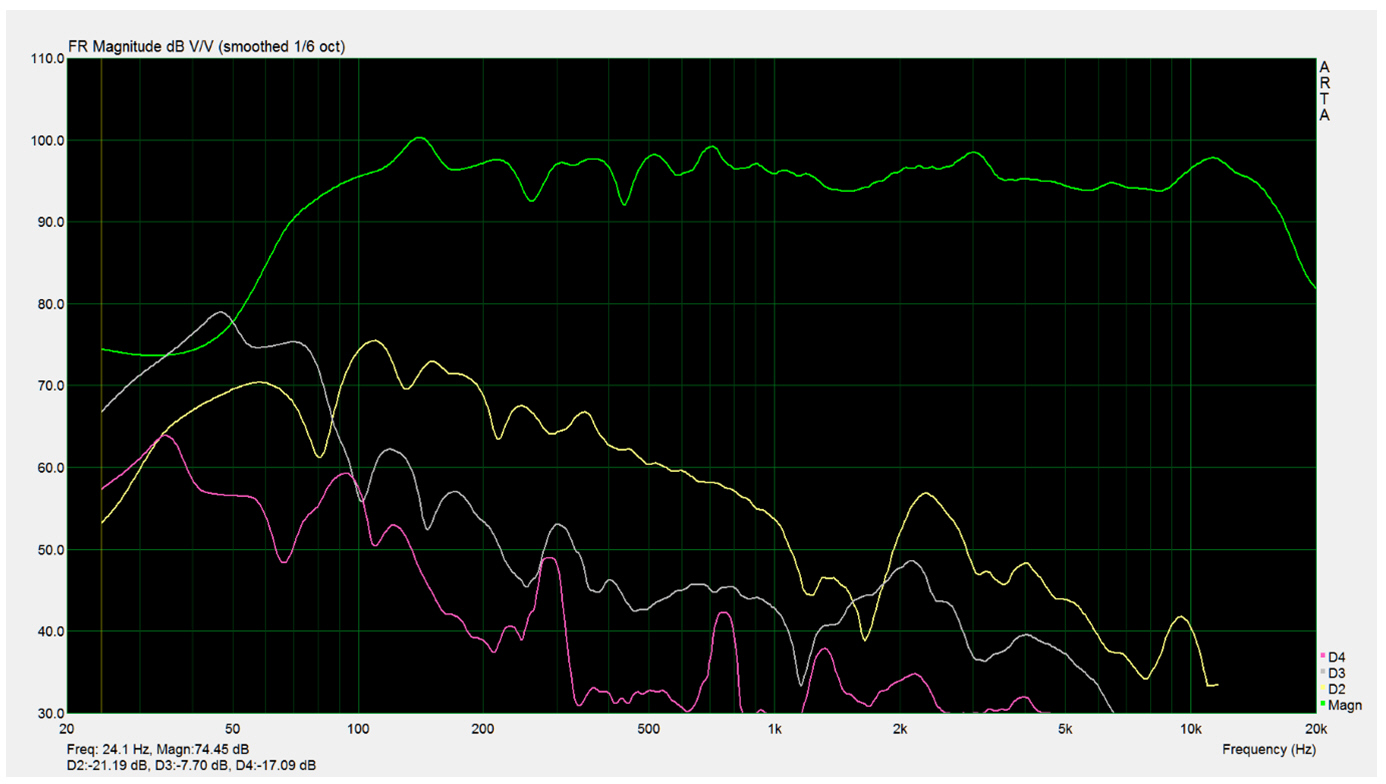
Below 500Hz is heavily influenced by the room, of course.
Enclosure Assembly:
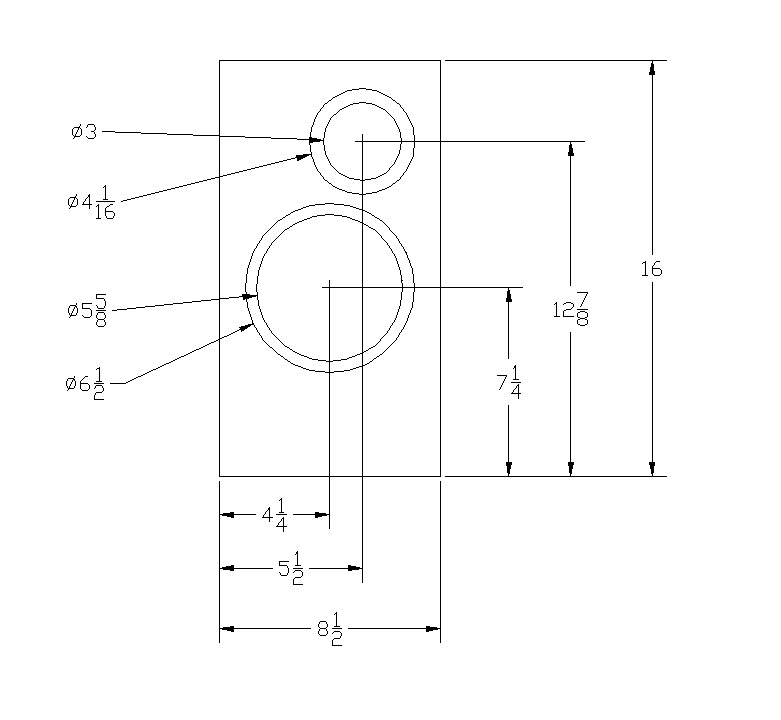
If using the Parts Express flat packs, follow their directions for assembling the cabinets. The supplied dimensions for the drivers are fairly accurate, so cutting the recesses and thru-holes can be done in advance – although this is really not recommended. A Jasper jig is desirable in this, but some careful work with a homemade circle jig will yield excellent results as well. I added a 1/2″ chamfer (not round over) to the back side of the woofer cutout. This is a detail that is very important on midrange performance and should be done to maximize the performance.
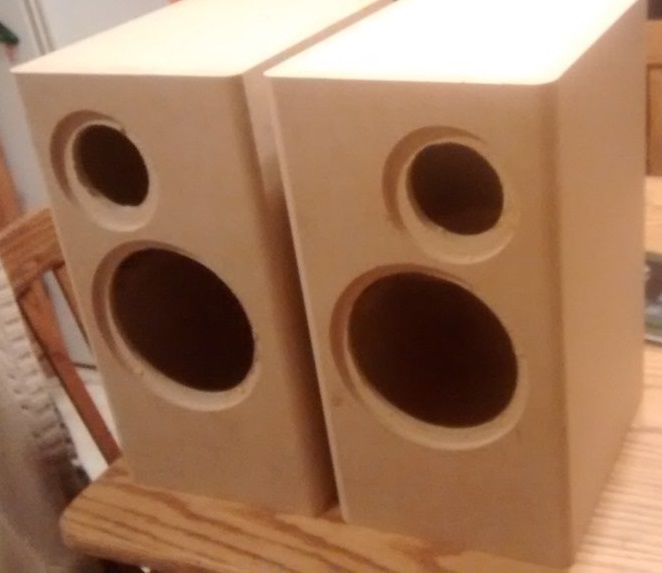
I have provided a baffle drawing for the 0.56ft3 for flat pack, if building from scratch the outside dimensions are 8-1/2″w x 16″h x 11″d. Use 3/4″ material on all six sides, and add a window brace in the middle. Parts Express graciously supplies CAD drawings for this cabinet on their website, as well. If building into a tower, it is critical to maintain driver layout from the top down. I finished my pair using black Duratex, which is my “go to” finish these days. It is durable, attractive, easy to apply and tough as nails. It is also affordable, which fits in with this project quite well!
Conclusion:
Of all of the budget projects I have completed in the last several years, this is the one I have enjoyed the most – from both a design and listening standpoint. It offers the rare blend of absolute affordability, good performance, and ease of construction. It was well received by my loving and very patient wife, as well as several of my friends whose opinions I value greatly.
I believe this design offers the DIY’er an excellent gift option, an affordable way to introduce others to DIY, or just to have the opportunity to build themselves a second or third pair of speakers.
Gallery


