“Audacity – A Music Editing Tutorial”
by Johnny Richards
Editing a “mix” track is a simple, fun, and fulfilling way to expand and deepen an individual’s knowledge of DIY Audio. To start, download Audacity from the following link: http://audacity.sourceforge.net/
Choose the download appropriate for the operating system being used; this tutorial will be in a Windows 7-64bit environment. Audacity is available for most operating systems.
Follow the instructions for installing the software, and choose the default options.
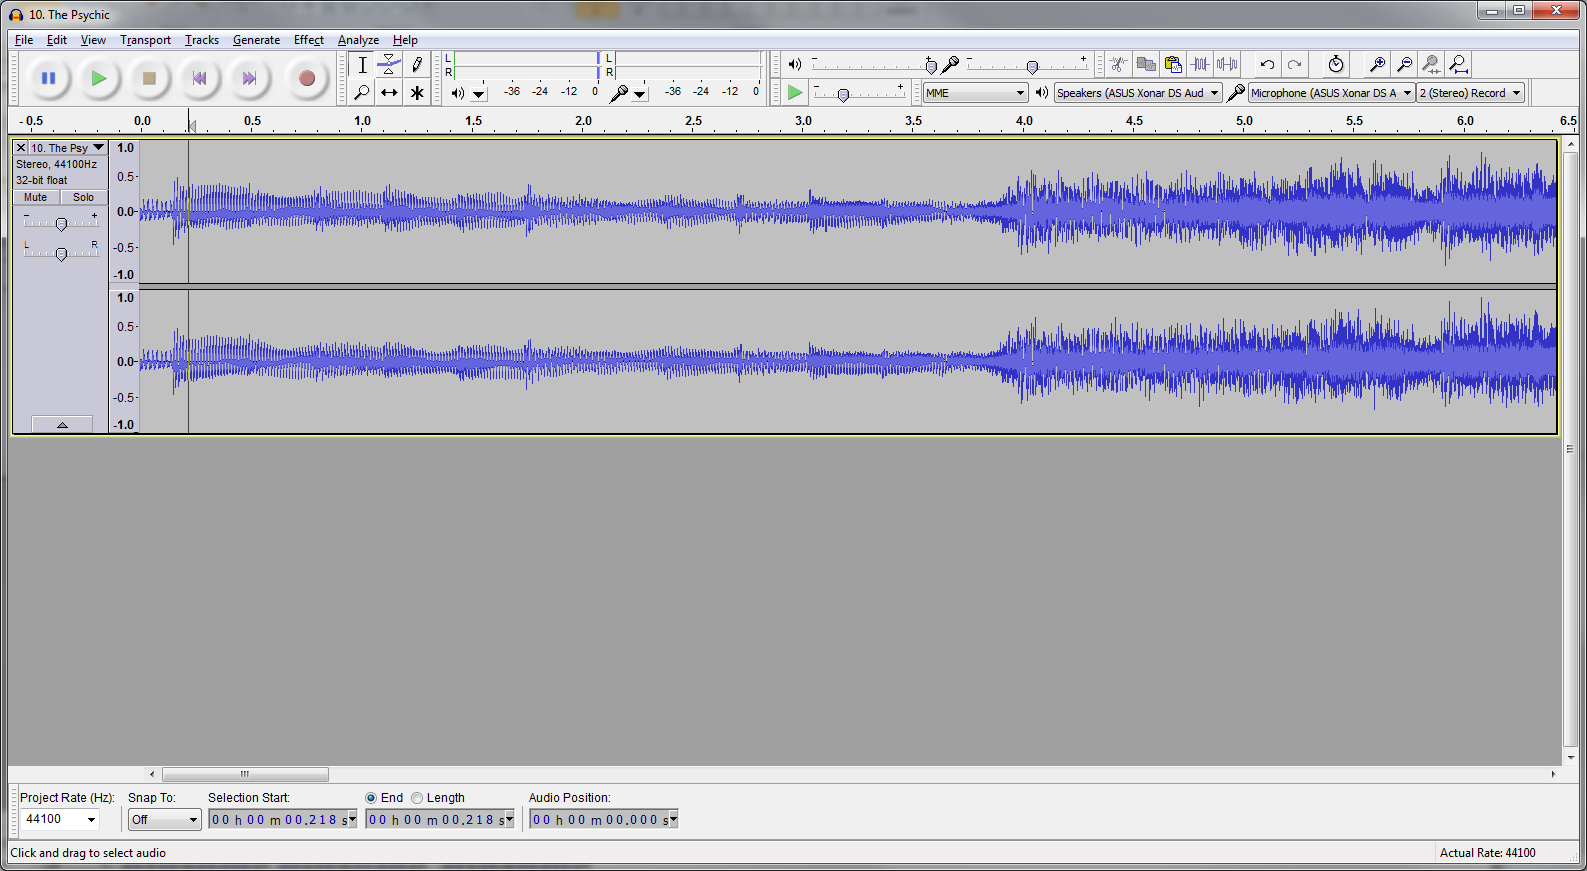
The startup screen looks like this:
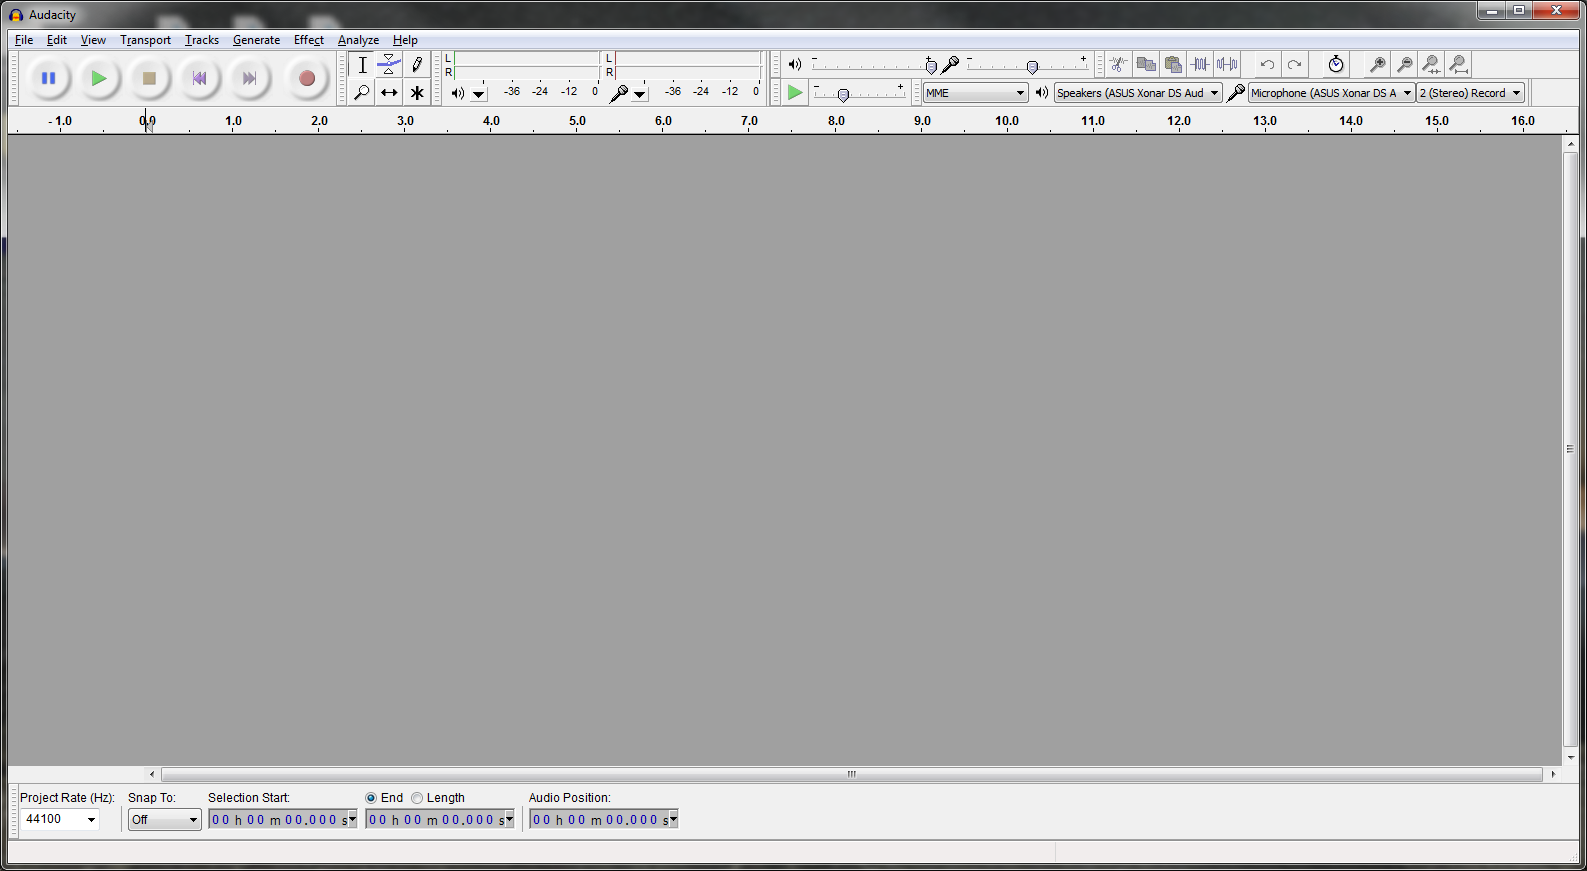
There is a row of buttons across the top left that look and function like basic media player controls, the next panel contains navigation tools, followed by audio I/O activity information, volume controls, editing tools, and hardware information.
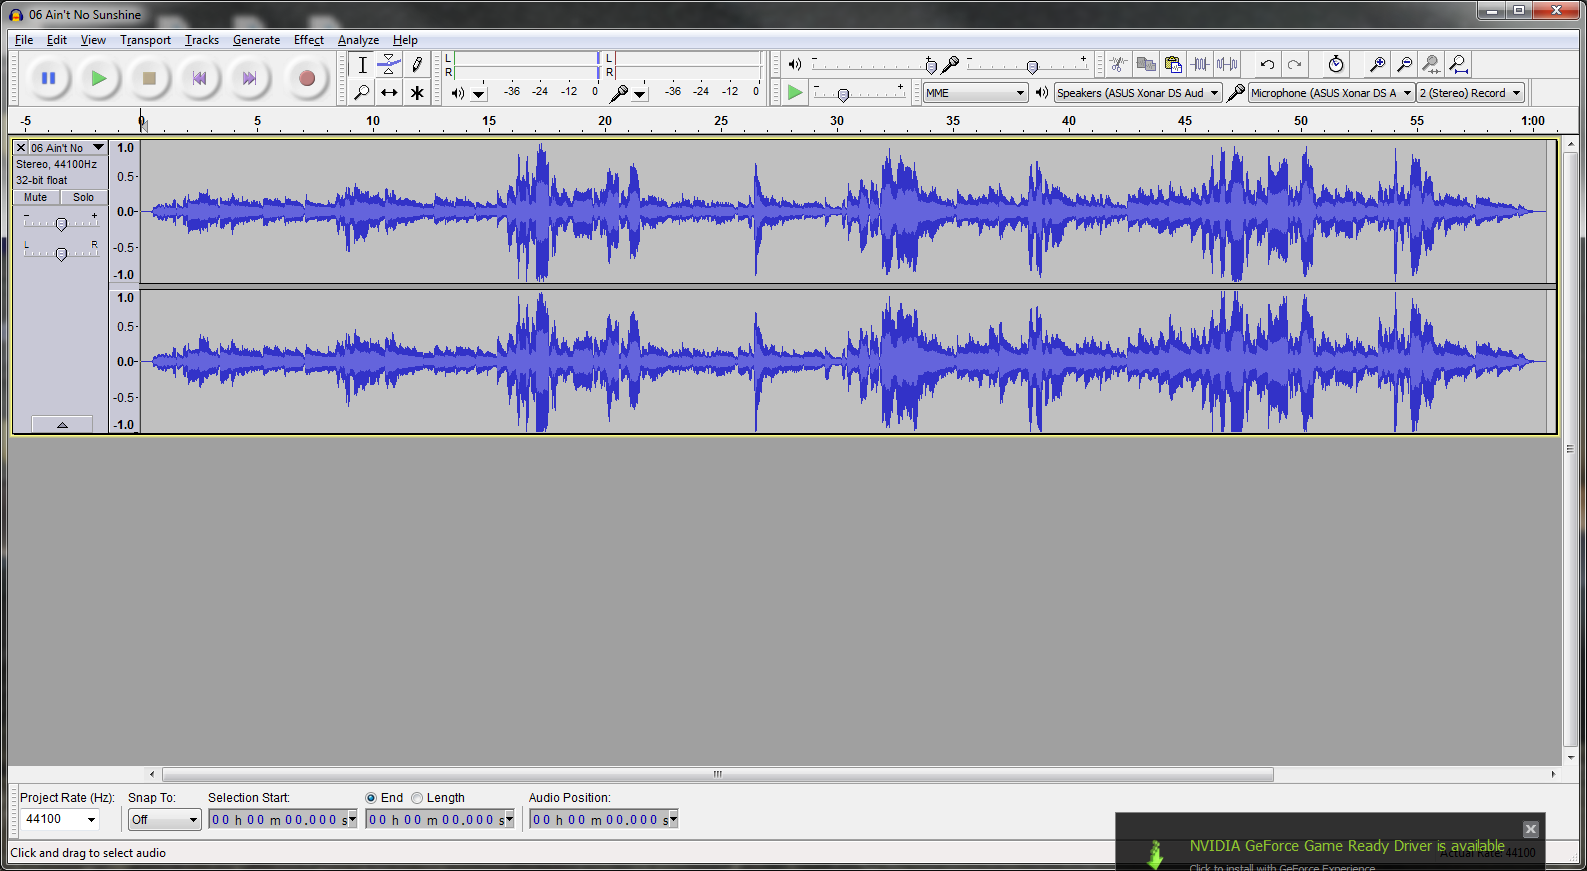
To open an audio file, use the classic Windows “File>Import>Audio” process, or simply drag an audio file directly into the software. Audacity natively supports editing WAV and FLAC.
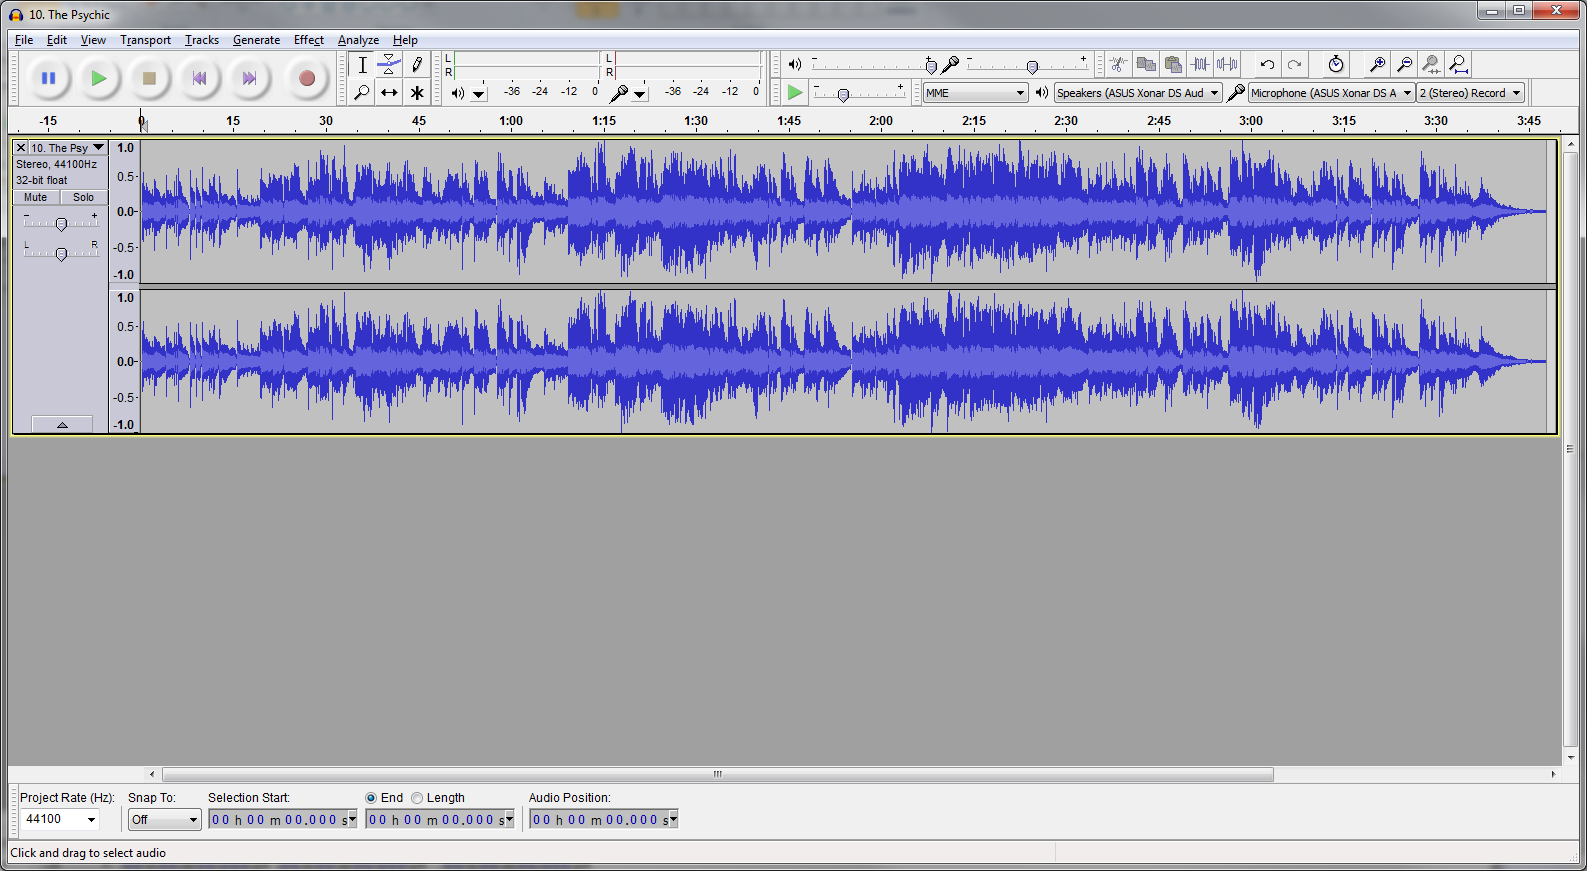
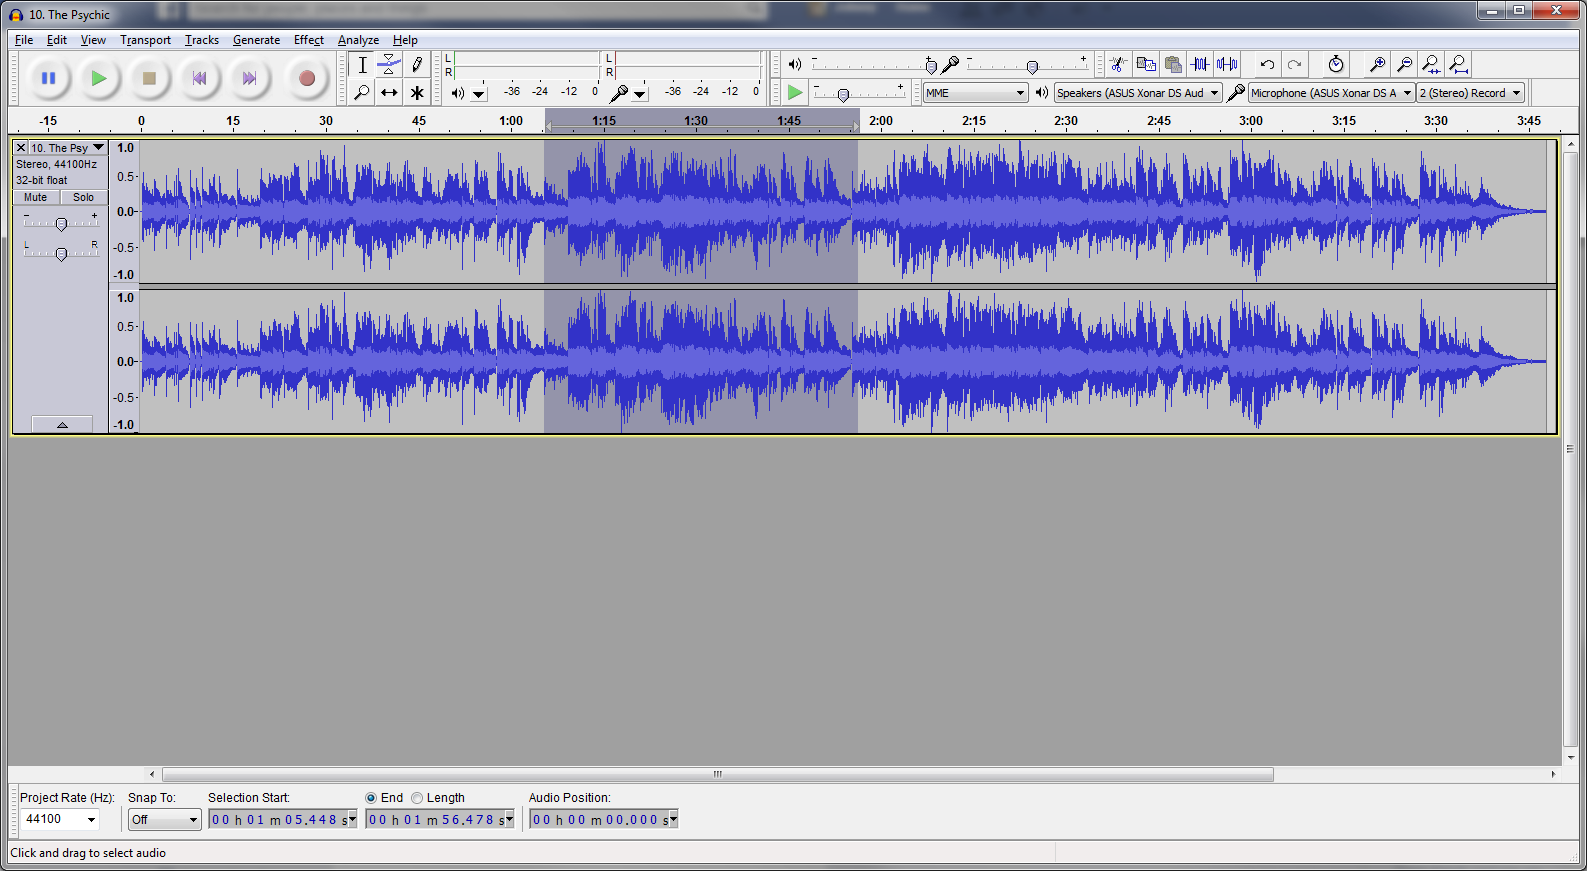
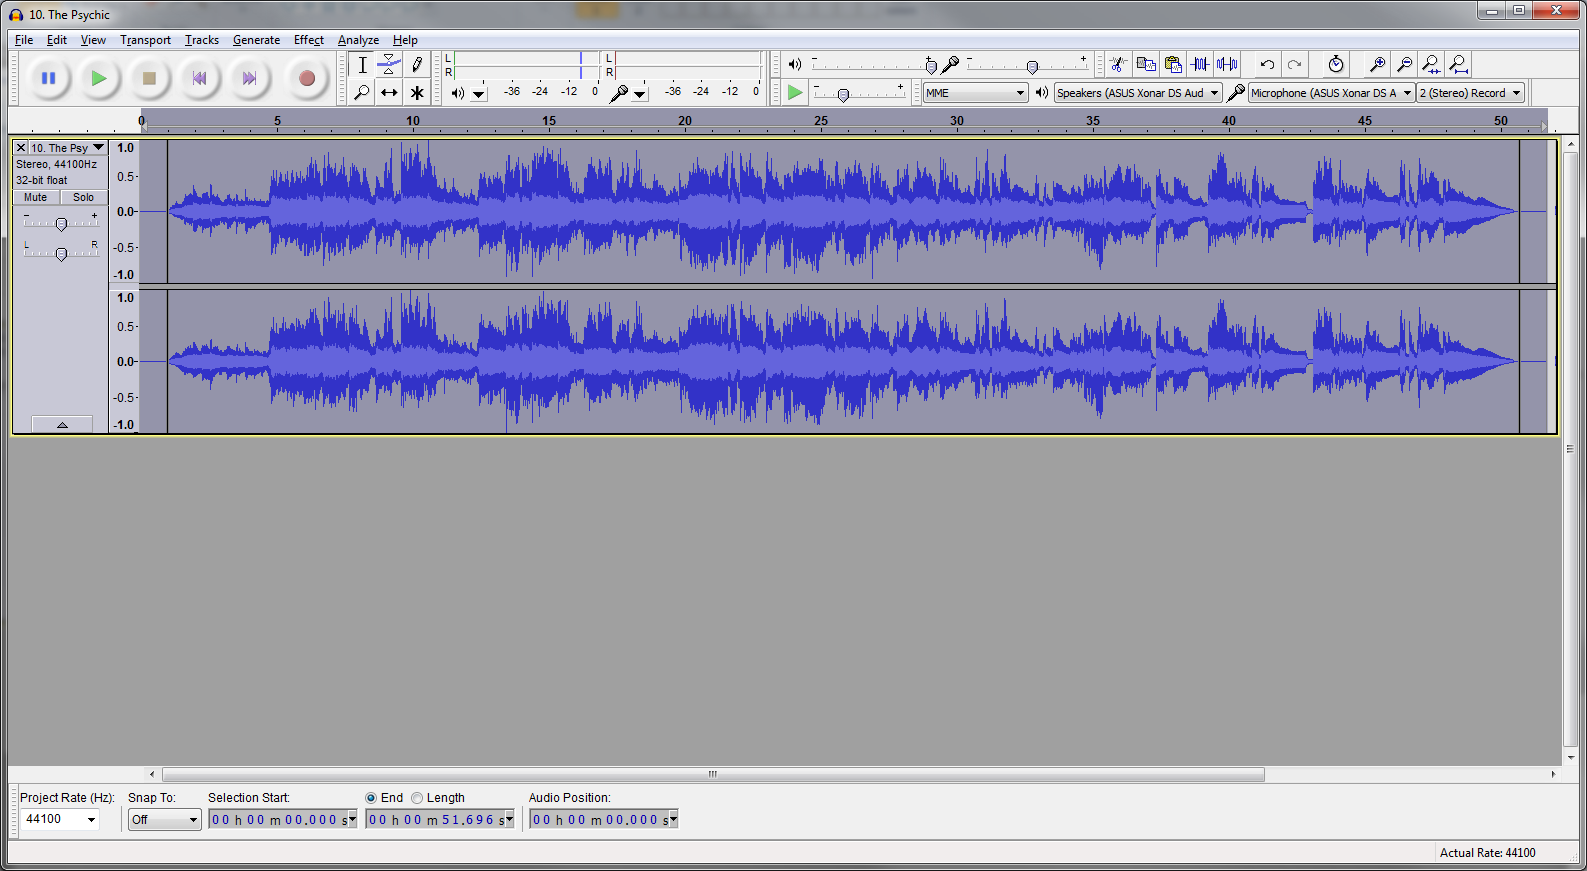
This is “The Psychic” by Crash Test Dummies off of their album “God Shuffled His Feet”. This is a graphical representation of the “wave form”. It can be analyzed in a variety of ways but one of the most important methods is visually. The track has a high dynamic range, which is viewable in the difference between the highest and lowest levels of blue, or the magnitude of the wave form at that point in the track. .
Music can only be as loud as “0”. To reflect this, some pre-amp/receiver volume controls start at a large, although negative, number and peak at “0”. On the waveform above, this is represented by +/- 1. It cannot be louder than that, and when it tries it results in what is called “clipping”.
There is a trend in modern music to mix everything louder, and while this is not in and of itself a bad thing, it is often done to such an extent that the louder passages are “clipped” in order to make the quieter passages seem louder. The following image demonstrates this trend in modern mastering processes, as well as an the current trend in the re-mastering movement to make older albums more closely match the “modern” sound of louder and more compression added.
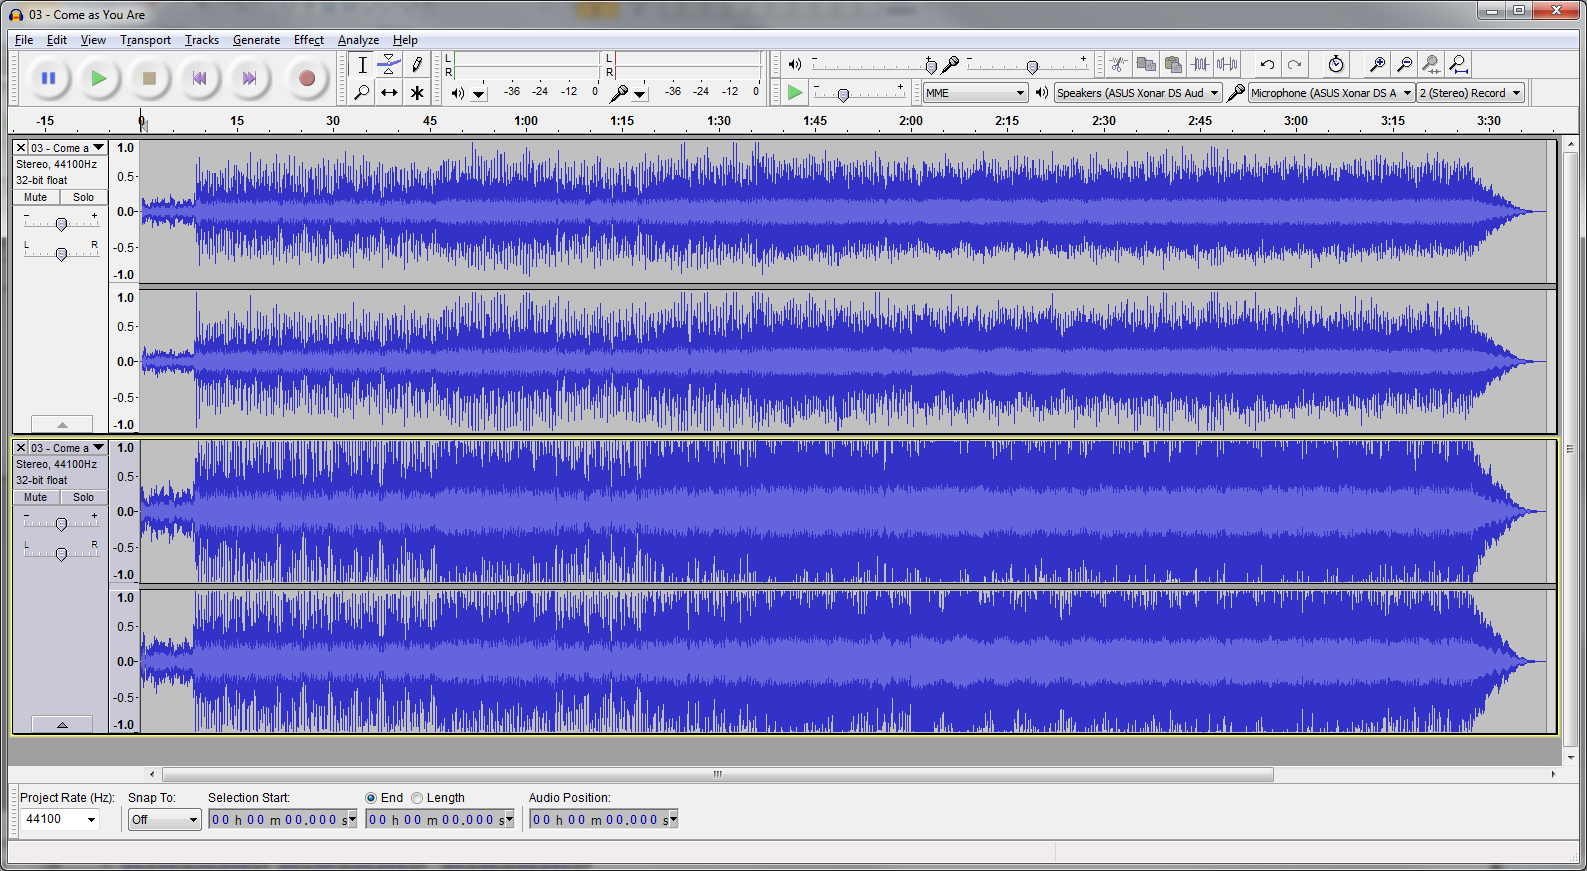
The top waveform is a rip of the original CD release of Nirvana’s “Come As You Are” from their “Nevermind” album, the bottom is a rip from the 20th anniversary edition of the same album. Overall, the track is much louder – but what is important to note is the sheer amount of information that is clipped on the louder passages. When the difference between the louder and quieter passages are brought closer like this, it is called “compression”. When people talk about the “loudness wars”, what they are generally referencing should be more correctly called the “compression wars”, since “louder” is nothing more than a relationship between an audio source and a listeners ears.
By performing a brief analysis of the audio file, the amount of loudness that can be added to the original cut without clipping is easily determined.
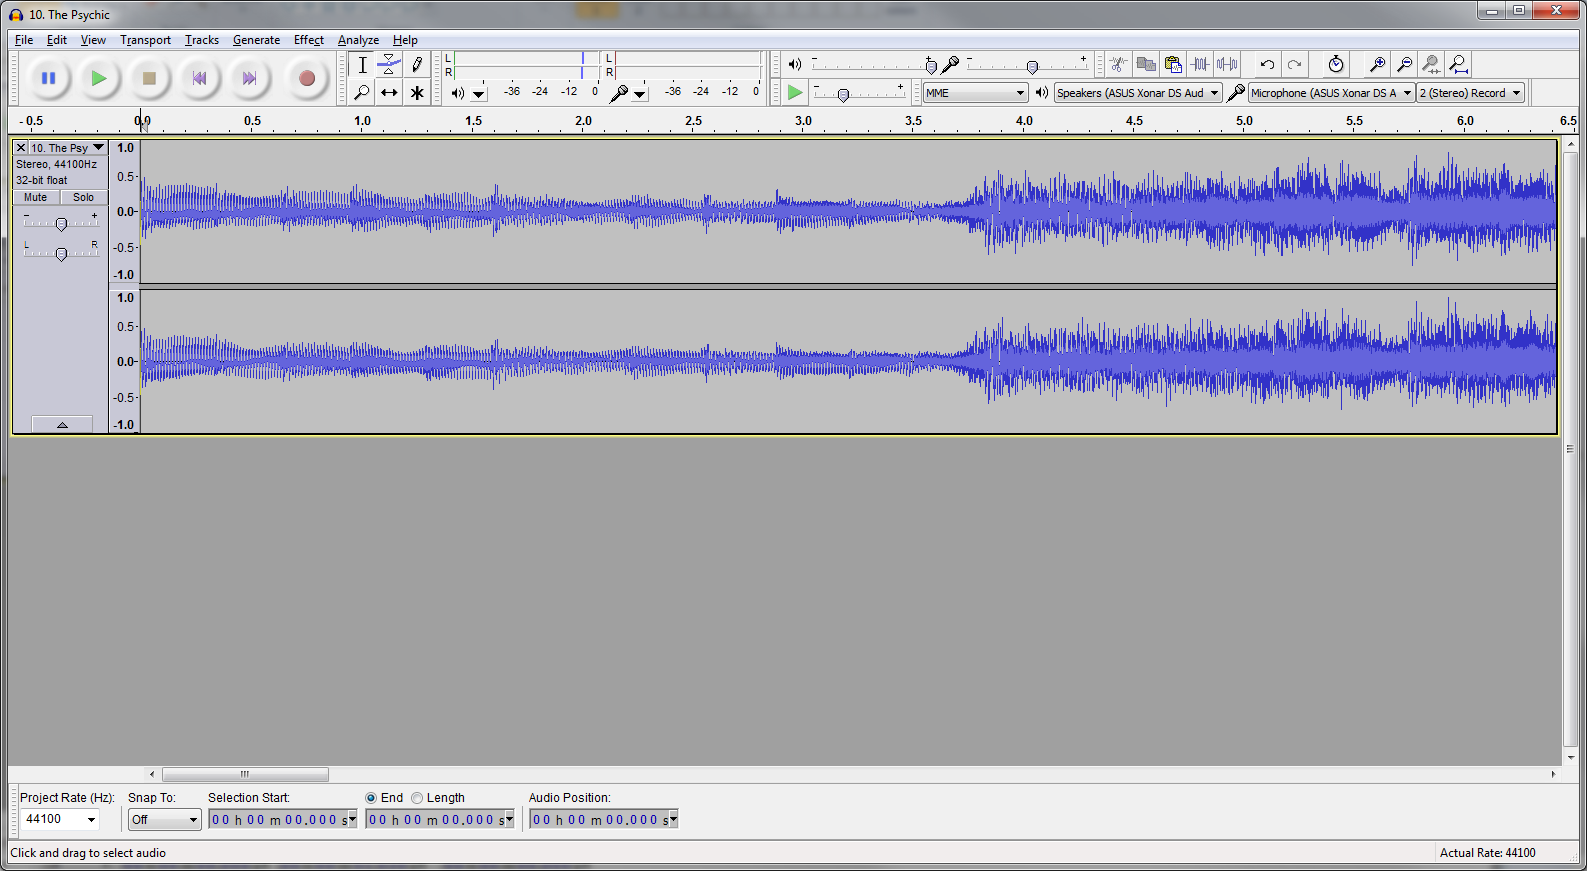
First, click in the area to the left of the original track to highlight the entire track. It will turn a darker shade of gray. Then, navigate to the top row, click on “Effect” and choose “amplify”.
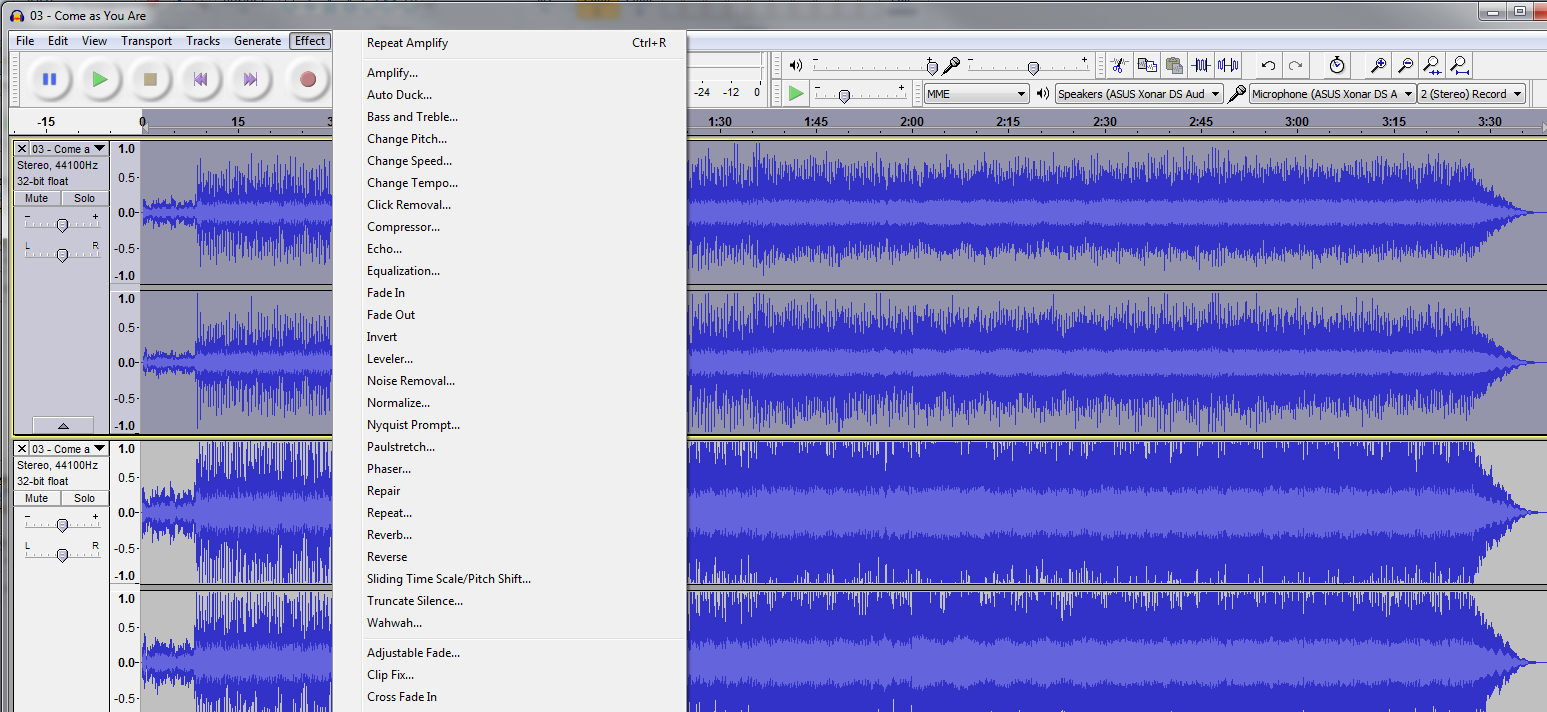
The effect will default to the loudness increase needed to get the loudest passage to reach the 0.0db reference. In this case, the track volume can be increased 0.2db and still avoid clipping. Checking the box marked “Allow clipping” will allow the volume to be increased with no theoretical upper limit (in the following example, the volume was increased by 25db) – but it will do so by clipping the louder passages:
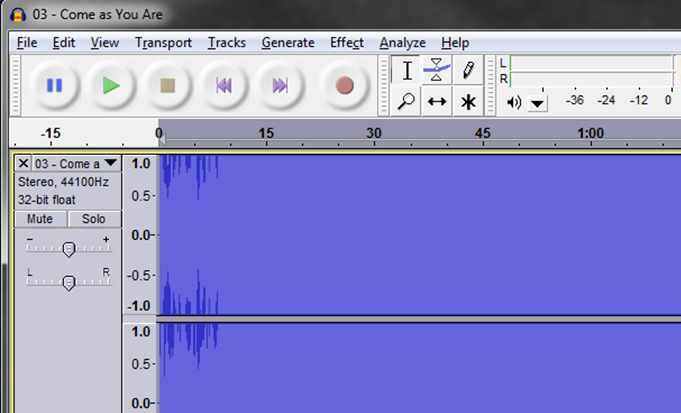
The re-mastered track will pop up and offer 0.0db of “headroom” for further amplification. That is because there are already passages in the track that are at the limit – and then some, as evidenced by the “flat-top” appearance of the wave form.
Another important analysis is looking at the frequency information of the track. When music is compressed using a lossy encoder like MP3, it is made smaller through several tricks – namely, the elimination of information deemed inaudible. Proponents of the format describe it as similar to listening for a pin-drop during a drag race. Debating the merits and drawbacks of the format are for a different paper, but it pays to take some time and learn how to look for evidence of a track having been converted into a lossy format. The same Nirvana track will be used.
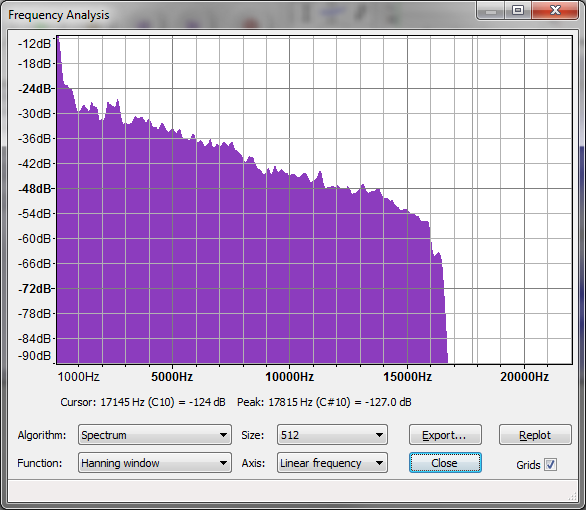
To perform this analysis, first select a section of the track by clicking and dragging the cursor left to right somewhere in the waveform field. In this case the 60 seconds between 0:45 and 1:45 will be used for this demonstration. Next, click on “Analyze” in the top row and choose “Plot Spectrum…”. This is a tool that is used to graphically represent the frequencies represented in the music, as well as the magnitude of those frequencies. This can be a handy tool for engineers who wish to restore tonal balance to a live recording, for example.
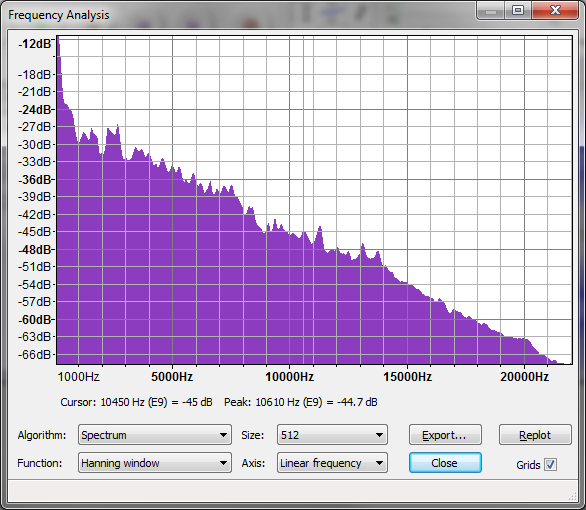
The above is the uncompressed version of the song. Note the information present above 20K.
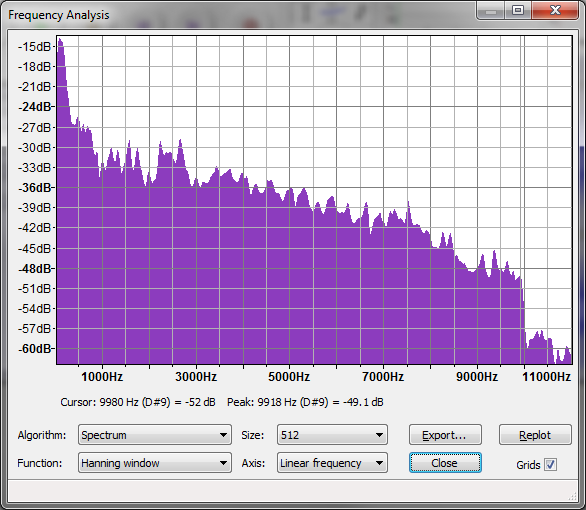
This is the waveform after being compressed to 64K MP3.
Now we are seeing what the most common format (128K) looks like.
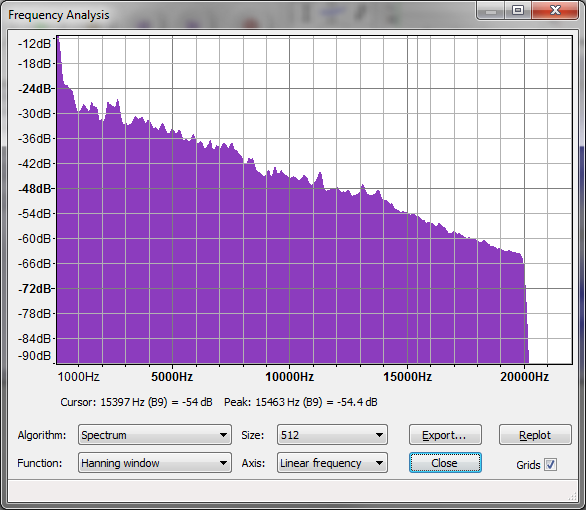
The final image is 320K compression level. In all but the uncompressed format, high frequencies are compromised to a varying degree. Looking for these aberrations is the easiest, most dependable way to determine if the original source, no matter the file extension, was compressed in the past. Additionally, since the 320K MP3 contains information up to 20K, it can be difficult for many people to identify it as a compressed track.
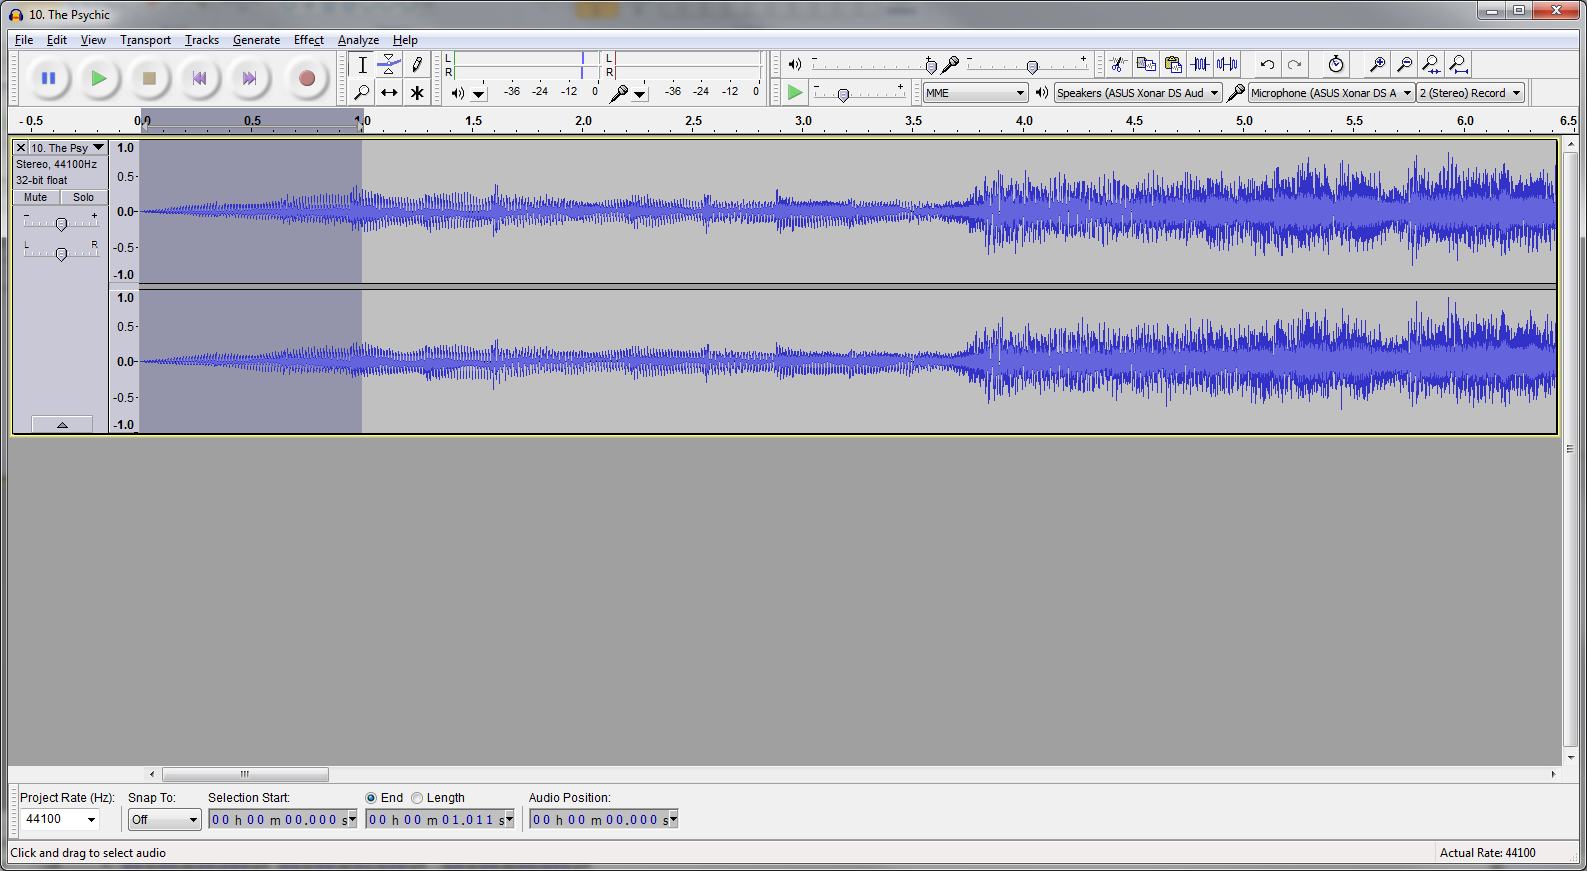
The next step is going back to the original Crash Test Dummies file, and covering the extraction of a section of the song for inclusion on a demo disk.
Generally speaking it is better to introduce and complete the track with a quiet passage. In this case, the selection starts around the 1:05 mark and ends around 1:56. It offers a lot of dynamic range, and a wide frequency range.
After selecting, extraction of the clip can be accomplished using Windows based keyboard shortcuts to cut the section. Audacity does this process from memory, the actual file is not being modified at this point.
A good rule of thumb is to target 45 seconds to one minute for each selection. This will ensure the entire demo is able to include many different types of music within the allotted five minutes, as well as offering the listener a variety of music to maintain his or her interest. Using a single, five minute song on a personal demo is, of course, up to the presenter but odds are the majority of the people in the audience will not be a fan of the particular song and will quickly go into fatigue mode if they do not like the song – the speakers reputation will suffer as a result.
One of the most difficult things to grasp when creating a mix is that an individual’s favorite songs are rarely high enough quality and/or interesting enough to showcase what the speakers are capable of. Demonstrations are meant to be an opportunity to engage in critical listening of the speakers capabilities.
Budget some time to research and explore what makes a song “technically” good, and a good demo will result.
The “cut” command via “Ctrl + X” on the keyboard will change the track, and it ends up looking like this:

There is almost a minute of audio stored in RAM, and it will need to be pasted back into Audacity. Click on the “X” in the field to the left of the waveform, and that will delete the existing file (from Audacity memory – not the disk), leaving a blank slate.
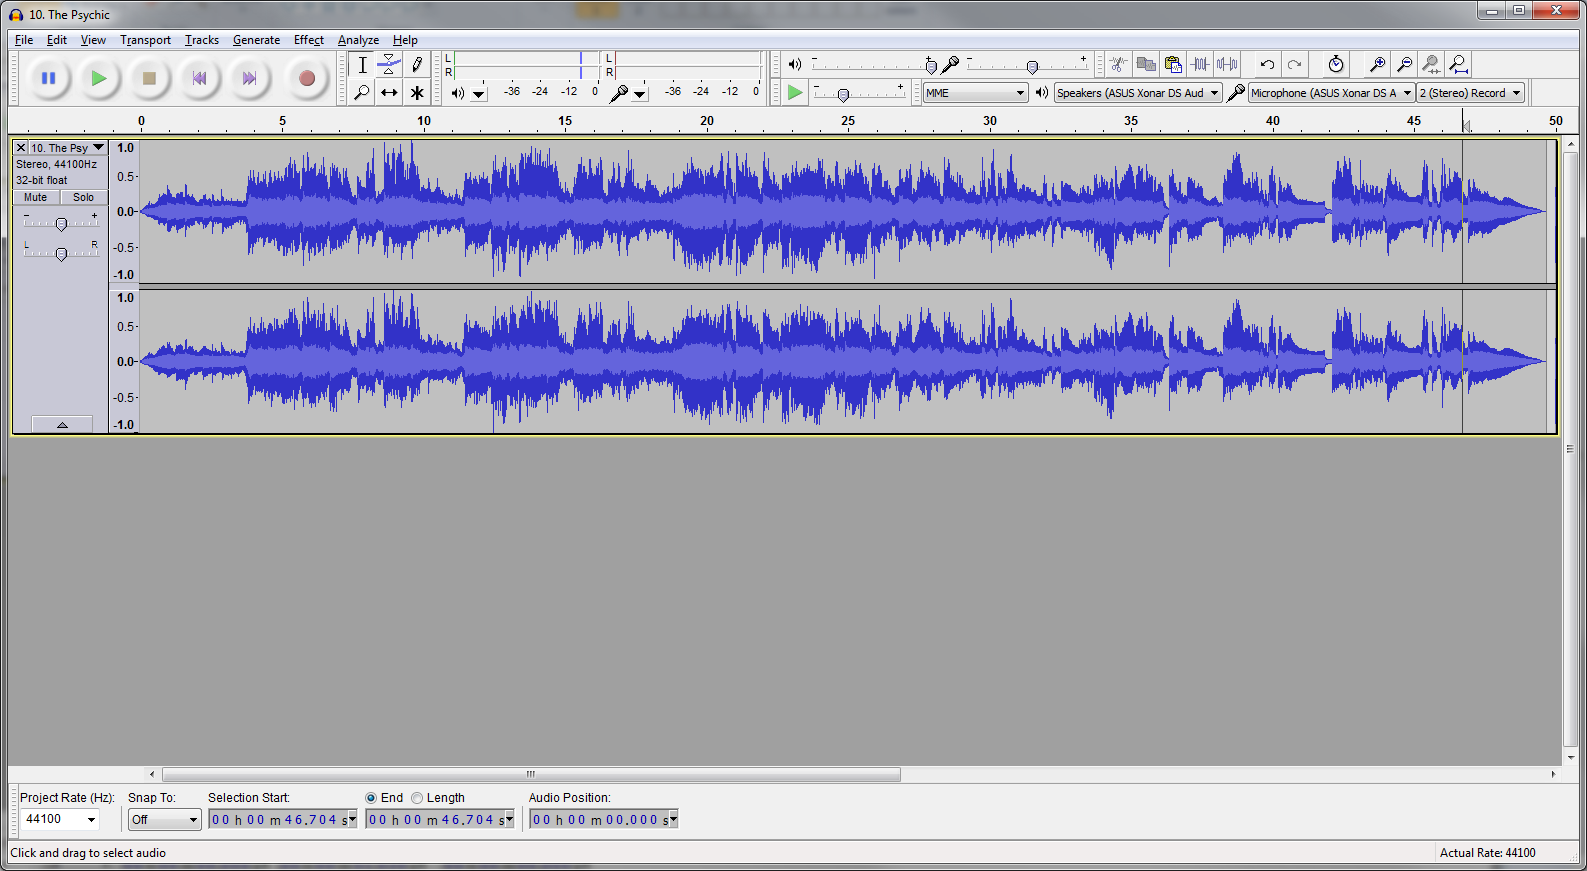
Clicking anywhere in the empty gray space followed by the keyboard command “Ctrl + V” will paste the stored audio track into Audacity:
Stretch the selection to fit in the window by clicking on the  icon.
icon.
Step one is zooming into the beginning seconds of the selection, Place the cursor as close to the beginning of the selection as possible, and then click on the  icon.
icon.
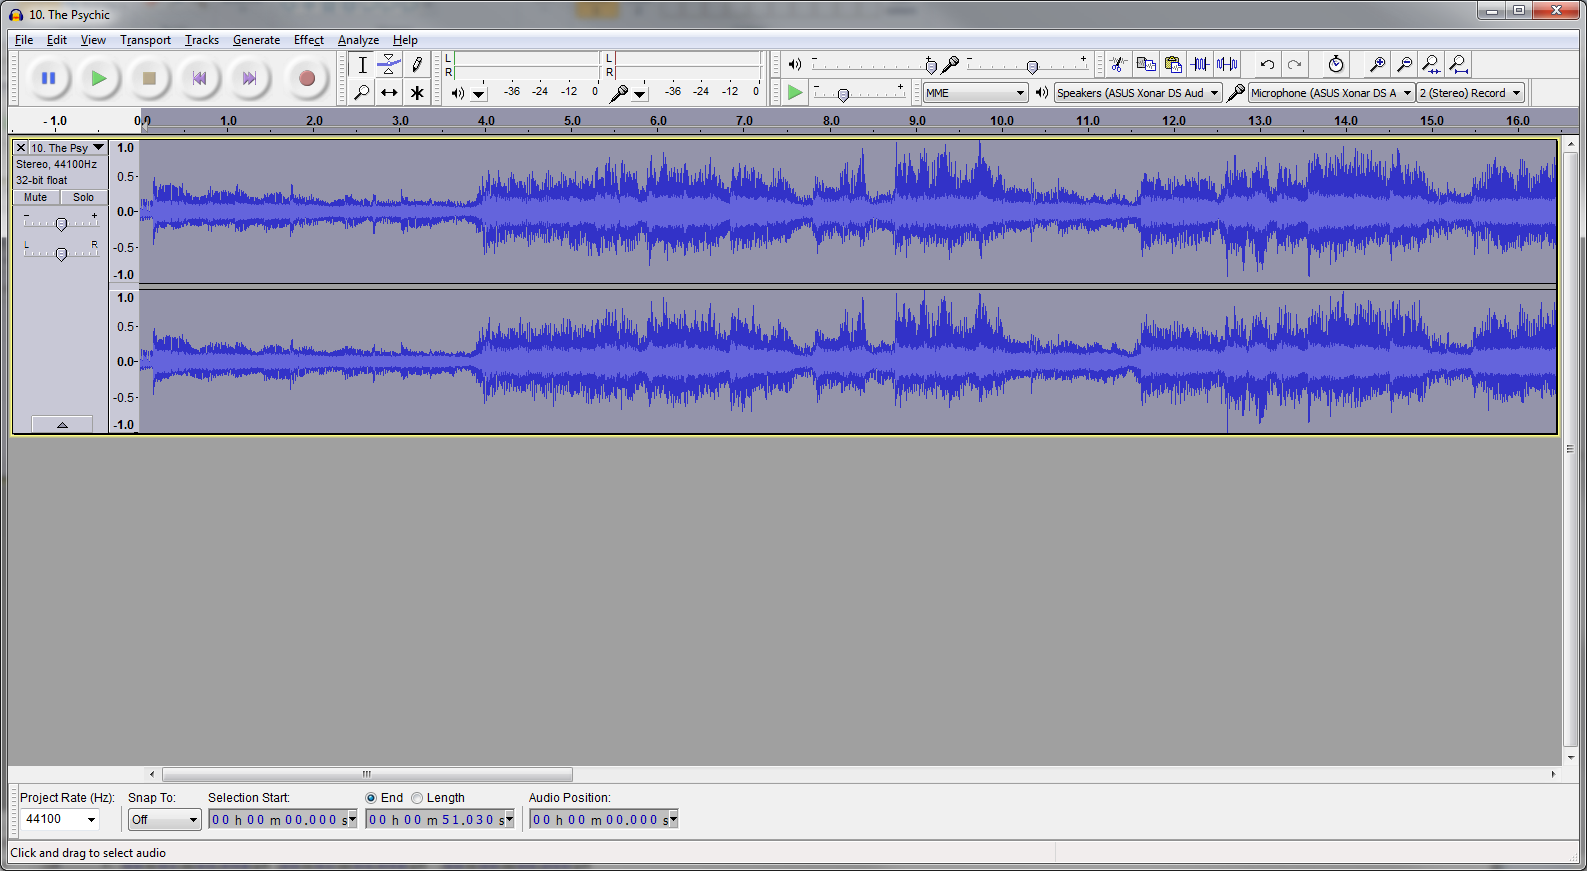
In the above image, the complexity of the musical wave form starts becoming apparent. While each individual note is actually a simple wave, combining them all together creates an incredibly complex wave – and should really highlight the amazing job a dynamic speaker does at translating those complex waveforms into the music that so many enjoy.
It is possible to get an impression for how a track will image by examining the wave form. The differences from the left to right channels are immediately obvious, but looking closely at region from 1.4 to 1.8 seconds there is evidence indicating phase manipulation – phase manipulation is one technique engineers use to generate width and depth in a stereo image.
This cut begins in a location that is almost perfect for demo use. There is only a bit of noise before the interesting passage begins, in this case only about 0.15 seconds. There are a couple ways to address this. One way is to simply highlight the first 0.15 seconds and hit delete. Another way, more elegant, is to use a “fade in” effect. Using both will result in the smoothest sound. By highlighting the first 0.15 seconds hitting delete, the noise is removed from the track:
The fade in technique is intended to let a listener relax after a dynamic passage. Composers since the classical era have understood the necessity to periodically give the listener a break. The fade in technique duplicates the soft start to the majority of music, and also helps to emphasize the dynamics in the louder passages.
Highlighting the first 1.0 seconds of the track and clicking on “Effects” and choosing “Fade In” will modify the track to appear such as the following:
Experience will allow the engineer to determine if it is a soft enough intro not to shock listeners, while simultaneously transitioning fast enough to grab their attention. Most tracks used for demo purposes do not need to jump right into a loud passage.
For the end of the track, the same process is used, only the “fade out” effect is substituted in place of the “fade in”. This selection can be made a little cleaner for the ending transition by everything past 49.7 seconds. This can be accomplished by clicking anywhere within the track and using the left and right arrows to navigate to the desired location, and then press and hold the “shift” key while using the arrows to highlight the selection.
Ending a track abruptly, when it is not inherent to the track is a faux pas, the fade out effect avoids this. Introduce the fade out at about 48.5 seconds to change the track to look like this:
There is now a nicely cut and trimmed demo track, but there are still a few things needed to make it optimal for demonstration purposes. First, a level check using the amplify effect. This shows there is already 0db of headroom, but looking at the wave form, it only hits that 0db at the 9.6 second mark indicating a very dynamic range. This track is ready, from a relative level standpoint.
However, if this is included as part of a larger set, it needs to have some silence before and after. Navigating to the beginning of the track can be accomplished by clicking anywhere in the waveform and hitting the “home” key on the keyboard to drive the cursor to the absolute beginning of the clip.
Silence can be generated by clicking on “generate” at the top of the screen, and choosing “silence”:
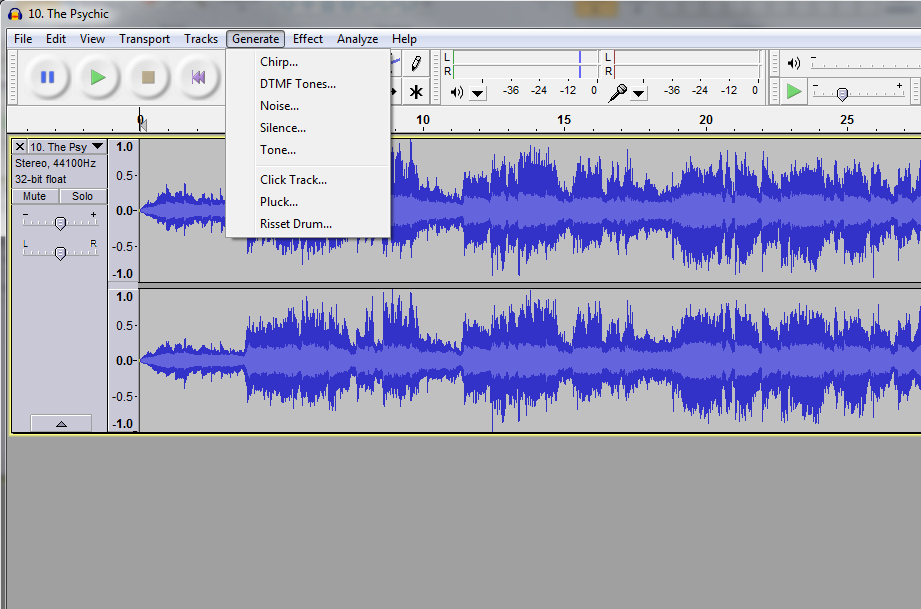
For duration, 0.3-0.5 seconds is generally adequate. This duration, combined with other tracks, will yield up to a second of silence for the listener to reset his or her ears. Running tracks together, especially when the tracks are of a wide variety of genres, will quickly lead to aural confusion followed by aural fatigue. The listener requires a little break every 45 to 60 seconds.
This is a common mistake in demo disks. Listeners sit for long periods of intense listening and people will generally start losing interest when presented with a constant loop of music. The silent breaks between tracks are there to alleviate this.
Repeating the fade and silence insertion at the end of the track will ready the file for inclusion in a demo disk.
(For visualization purposes, there is 1 second at the beginning and end rather than the 0.5).
The clip will need to be “exported” to be included in a demo disk. Select the entire track, click on “File>Export Selected Audio”, choose a destination and name the file. The files can be named in any fashion that makes sense to the engineer, but the format has to be: WAV (Microsoft) signed 16bit PCM and the .wav extension needs to be added manually to the file name in this dialog box if it does not show up as such.
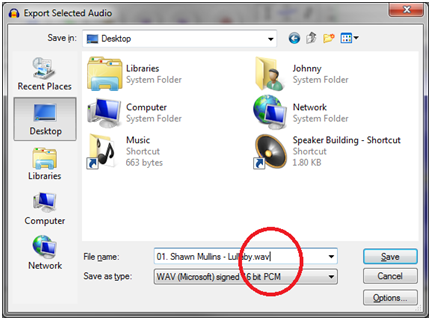
Audacity has been working with raw data; the software is only aware of bits and bytes and requires the user to tell it what format is needs to be. Some audio editing software will make assumptions that the file should have the .wav, appended to the file, but that can actually create issues.
Clicking on “save” after naming and formatting the file will bring up the Metadata edit window. Editing the tags in a file is strictly a personal preference, for demo music it can be helpful to leave the artist and title as-is, while changing the album to “XXXXdiy-20XX”. There are more advanced tag editors available, such as found in Foobar2000.
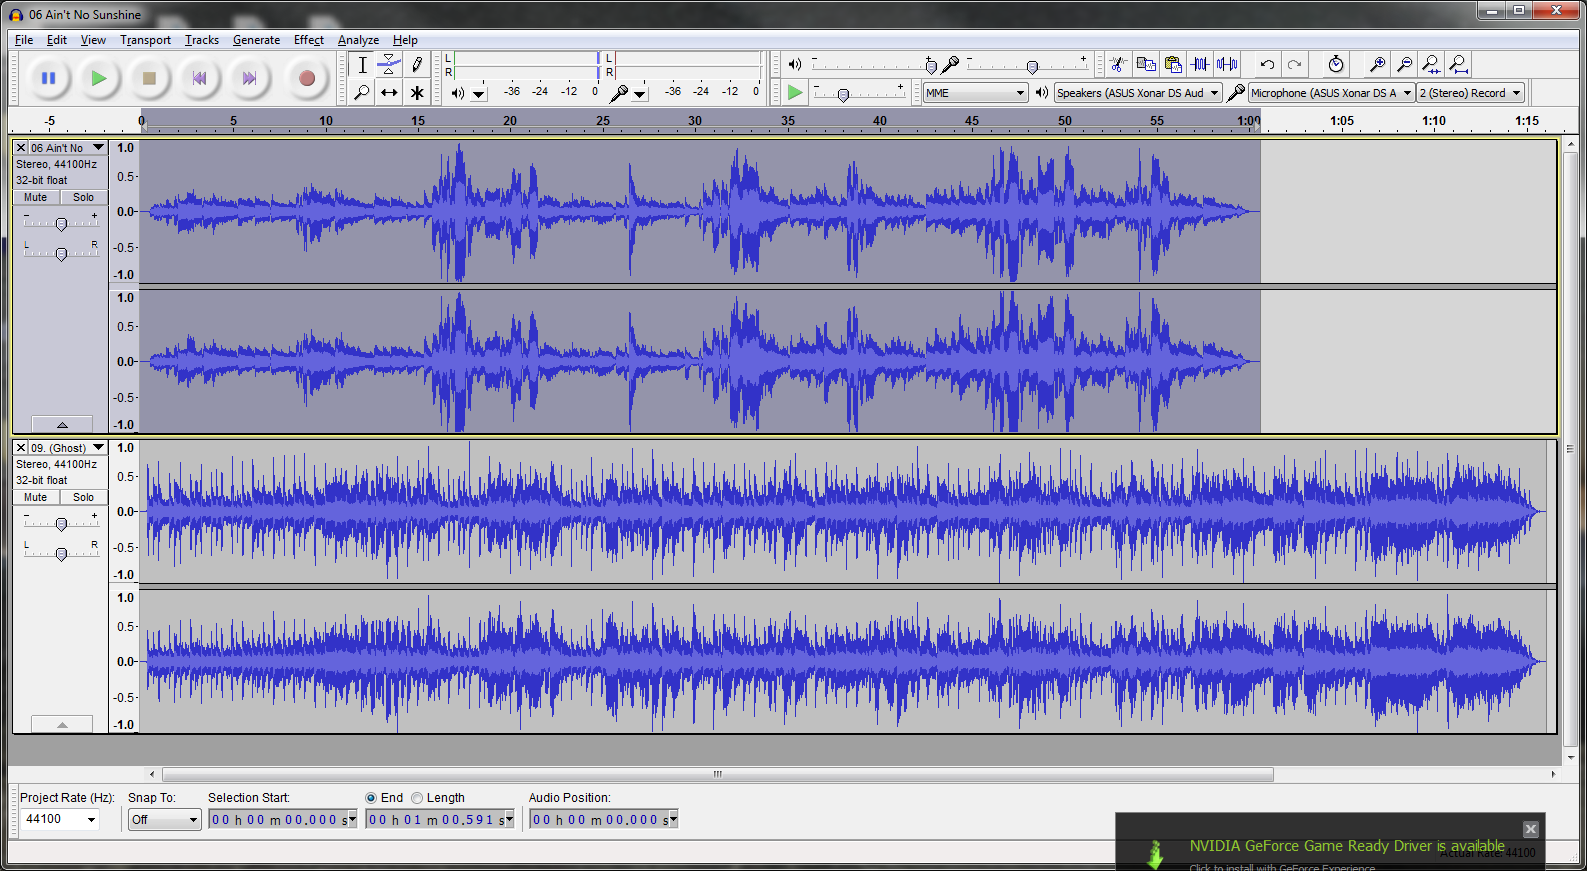
Combining multiple files in Audacity can be accomplished in a variety of ways, the following method can be more time consuming, but is less prone to mistakes. Drag the first clip into Audacity.
Drag a second clip into the empty area of the window – it will show up under the first clip, like this:
Highlight the entire second track by clicking in the field to the left, and simply cut it using “Ctrl + X”. Next, click somewhere in the first waveform, press the “End” key on the keyboard and the “Ctrl + V” to paste the second clip. Repeat the process for each clip being used. When the clips are imported into Audacity, there will be a prompt suggesting making a copy of the clip being imported, it is a good idea to agree.
When finished splicing the entire demo together, it will look something like this:
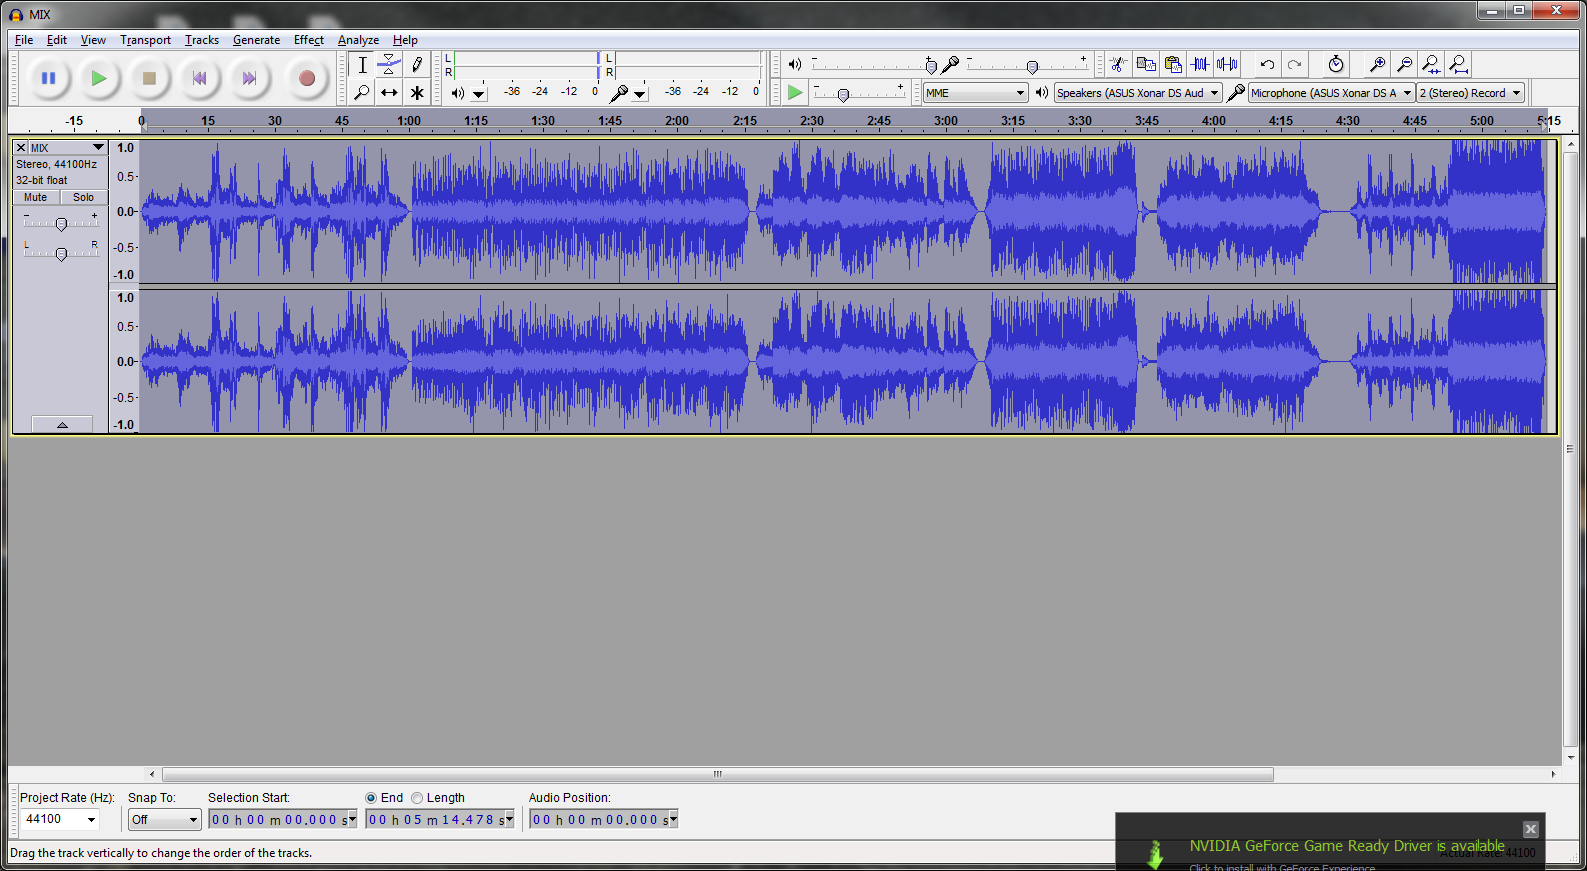
At the bottom of the screen, it displays the total length of 5:14, and the separation of the various tracks are readily visible. Additionally (and this is personal preference) as the demo progresses, the tracks trend towards louder on average.
Run the export routine for the entire demo, and the result is a single track, ready for showcasing some speakers!
Additional:
Using the generate function in Audacity, you can add pink noise at the beginning of the track – this is useful when setting listening levels. Generally, 5-10 seconds is sufficient for this purpose.
There is flexibility in the Audacity interface, the individual controls in the menu bar can be docked and re-arranged.
There are a wide variety of plug-ins available for Audacity, and with the installation of the “Audacity VST Enabler” found at http://web.audacityteam.org/vst/, high end and professional audio tools can be integrated.
For the adventurous, Audacity can be re-compiled to include support for ASIO drivers, as outlined here: http://wiki.audacityteam.org/ASIO_Audio_Interface
The LAME MP3 plug-in for Audacity can be found here: http://lame.buanzo.org/
Foobar2000 (http://www.foobar2000.org/download) is an excellent player in its own right – but its biggest strengths are its file conversion properties as well as its file tagging properties. Not necessarily for beginners, but extremely powerful with a wide variety of plug-ins.
MediaMonkey (http://www.mediamonkey.com/) is a popular player with Metadata editing capabilities and powerful library management features.
Visit Midwest Audio Club, it is THE source for Midwest DIY Audio event news and multimedia!